Direct-Vent Fireplace Conversions
YES, you can have a Direct-Vent Fireplace With Fireglass!!!
Contrary to popular opinion, (or should we say ignorance) yes it is possible to have a Direct-Vent fireplace with FireGlass. So if you're tired of hearing "No, you can't do that" give us a call, or send us some pictures of your
Direct-Vent fireplace.
About Direct-Vent Conversions:
- Direct Vent Conversions DO-NOT Modify the amount of fuel the unit receives.
- Our conversions just change the way you see the flame.
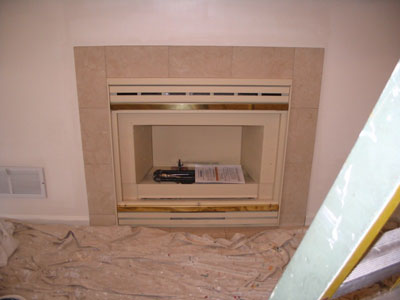
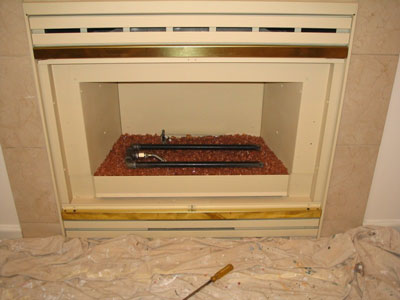
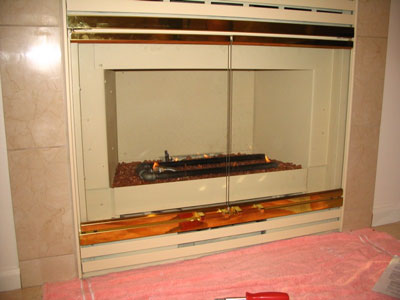
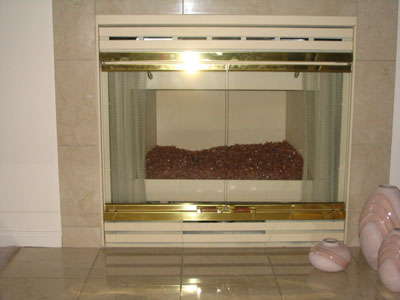
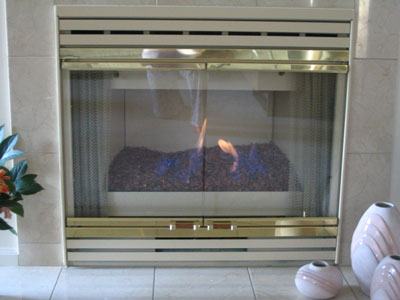
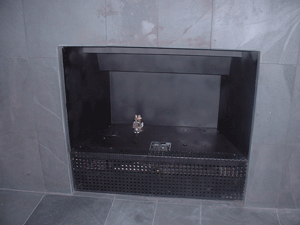
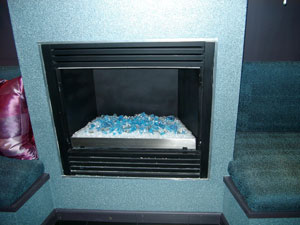
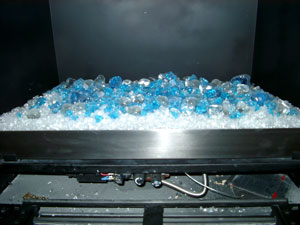
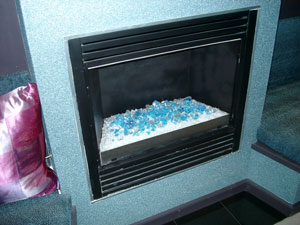
The pictures below are of Dr Micheal Marshall Fireplace Surrounds
CLICK on the link or the picture below to see the surrounds with the Star-Burst Pattern!

________________________________________________________________________________________________
_________________________________________________________________________________________________
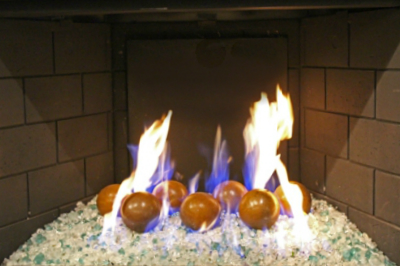
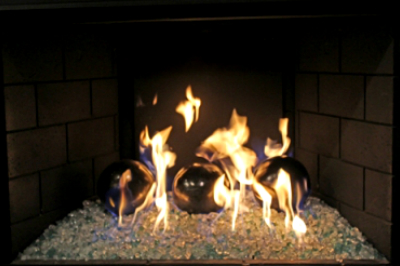
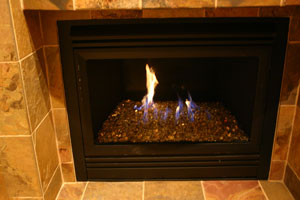
The picture below is of the completed Fireplace Surround, Direct Vent Conversion, FireGlass installation and the FireBalls Looks great!
Click "HERE" or on the picture below to see how this was made and installed.

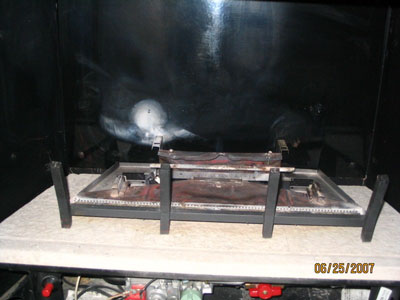
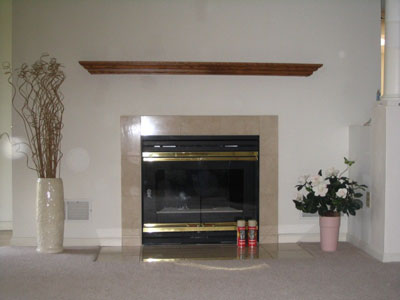
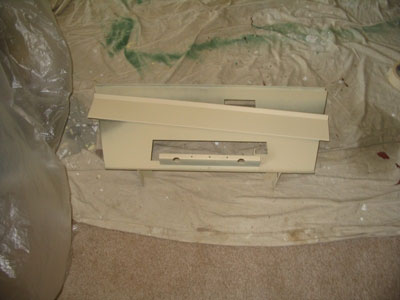
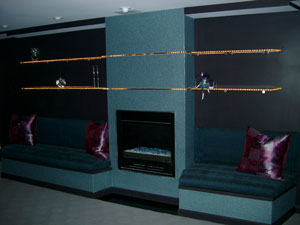
Terry and Holly Utley had a direct vent fireplace, and as usual they were told that they couldn't convert to FireGlass. So we had to go and do the impossible again as well as install a custom fireplace surround.
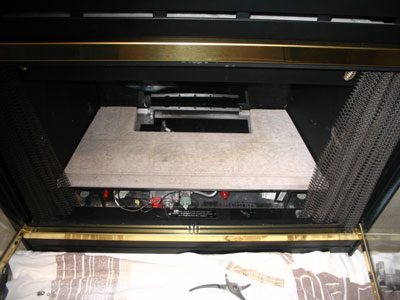
Even with the surround installed the electronics were still exposed, so we had to add a few more pieces to add to assure a clean finished look.
Now that's much better.
The Fireplace was filled with Starfire Base Glass and and Cobalt Toppers - turned out great ladies!

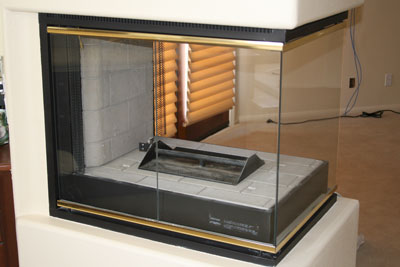
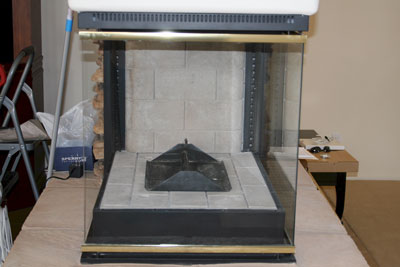
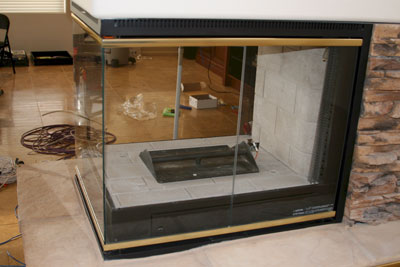
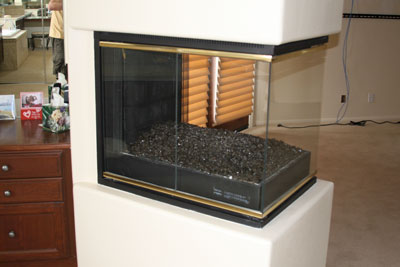
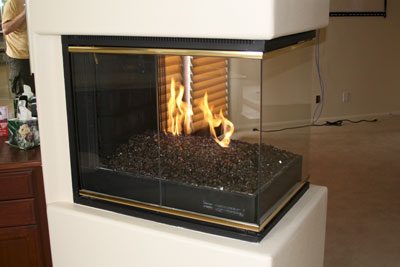
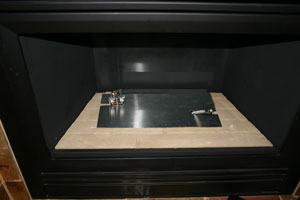
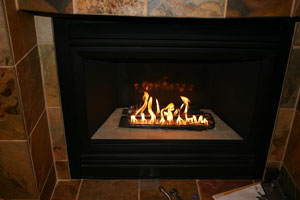
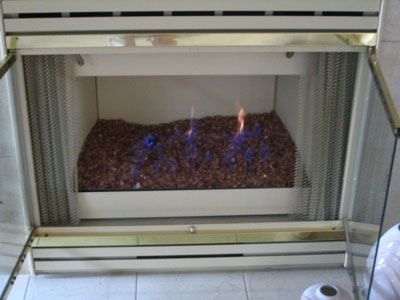
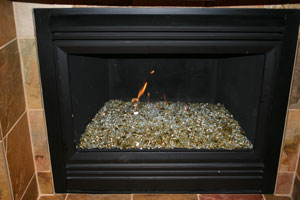
Mark Diefre has a Palm Springs condo with two direct vent fireplaces that suffered from ugly dirty fake logs.
So he contacted us, like everyone who gets told they can't have a direct vent with fireglass. Below you can see the unit as it was originally, with a low level fire.
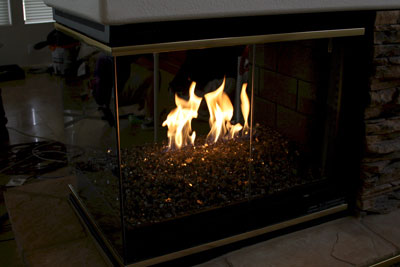
Here is the same fireplace after our conversion, notice how much larger the fire is.
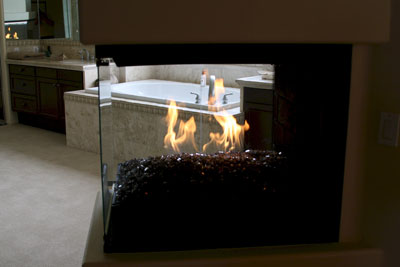
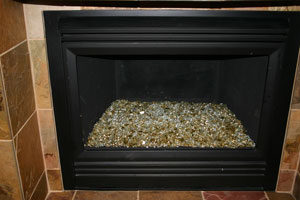
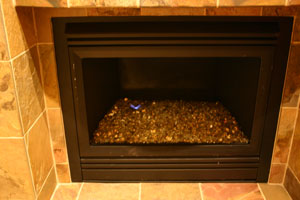
And even though Mark's fireplace looked a lot better, he still wasn't satisfied. So he got a Sterling Silver panel for the back-wall.
A while later though we again heard from Mark, who decided he needed two more Sterling Silver panels; completing his Direct-Vent fireplace.
With the success of the downstairs fireplace, Mark decided on doing a his upstairs Direct-Vent fireplace in the same fashion.
Both fireplaces used Gray Base Glass and Gray Reflective Base Glass FireGlass.
Decorative Fireplace FireBalls
Our New Colors Have Arrived!!!
We will be adding them over the next few weeks. So please check back often to see our NEW exciting and exclusive collection of FireBalls.
Also Check Out Our Cement FireBalls, & Fire Clay Rocks.
These photos come to us from Larry King who like so many othere's wanted to have has fireplace burn fireglass.
Keep in mind that we DO-NOT recommend that you do this without our assistance.
Larry used Starfire Base Glass FireGlass and Irridized Clear Diamonds.
Larry also got a Large 8" Dark Gray FireBall, however he decided to display it on the shelf next to the fireplace. Which works just as well! Here is what Larry had to say:
"Ed,
You're the man! This turned out great...We have an upstairs fireplace to do now so you will be hearing from us shortly as we prepare to convert that one too."

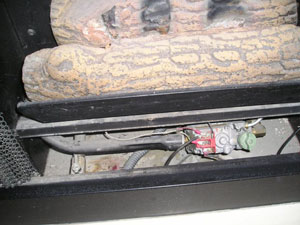
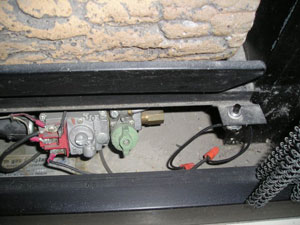
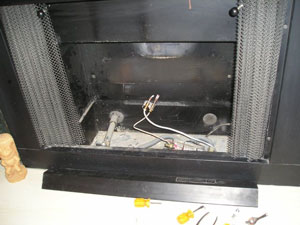
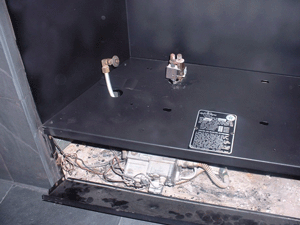
The following photos were sent us from our customer who has a rather unique Direct-Vent fireplace. What made it so special was that they had a lighting system installed underneath the fireplace hearth.
However, our client new it was time to get rid of their ugly old logs and get some beautiful clean burning FireGlass.
These photos are good examples of the type of detailed pictures we need to help you modify your Direct-Vent fireplace.
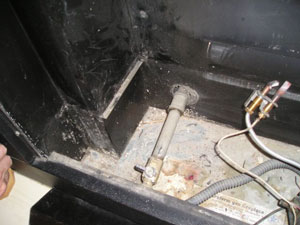
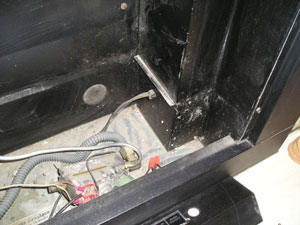
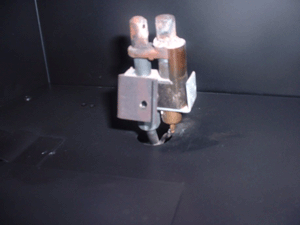
In these photos, the pilot, ignition system and the lighting system are located underneath the unit.
The flex line was sauntered to the burner orifice. Note, that aluminum plate was cut to match the existing pattern, this was to assure that the lighting coming from underneath would not be obscured.
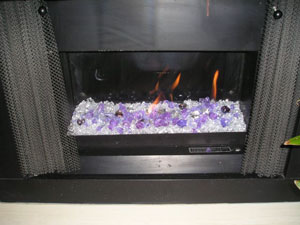
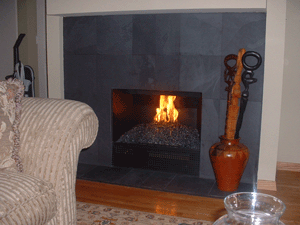
The FireGlass used was Sky Blue Base Glass, Azurlite Base Glass, Azurlite Reflective Base Glass, Clear Diamonds, ICE ICE ICE Topper, Mini Sky Blue Luster Diamonds, Red Terra Cotta FireBalls, and Polished Sterling Silver Plate (which creates the mirror effect)
Turned Out Beautifully! Check out the light coming from underneath the FireGlass. Great Job Ed Moy!!!

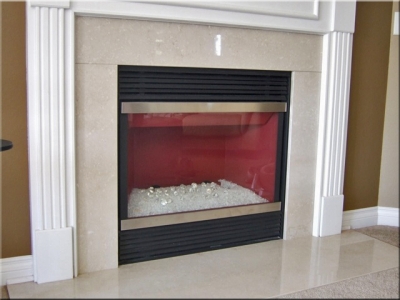
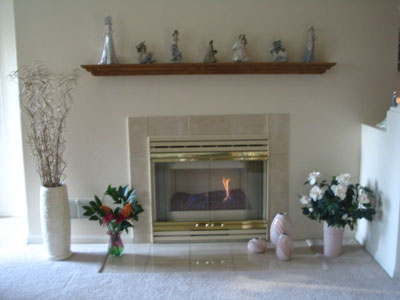
Abby Cameron sent us the following pictures of her Direct Vent Conversion.
Completed with 1/4" Clear White Base Glass, California Gold Base Glass and Ice Ice Ice Topper.

This direct-vent fireplace was another job we worked on remotely with our customer Teresa Leets (an attorney in Los Angeles) who through email's and phone calls managed to complete the conversion process on her own.
Below you'll see some of the detailed pictures provided by Teresa that display all the direct-vent components. So much for those fireplace guys!
She used Starfire Base Glass and Hyacinth Topper. There are a few fireplace companies who say this can't be done, really! So I guess this doesn't really didn't happen?
Double 18" burner with Clear Base Glass FireGlass.

These fireplace pictures come to us from Joyce and Tom Dane who through digital camera photos, emails and phone calls completed the project from beginning to end
Below you can see the interior painted and looking much better!
The lava filler underneath the burner.
Test the burner and the flame direction. Once you're happy simply pour your FireGlass over the burner. The FireGlass used was Pink Rosa Base Glass.
You can leave the doors on or take the doors off, whichever you prefer. But we prefer/recommend for the doors and screens to be removed. And instead finish with a custom fireplace surround.
 |
 |
These fireplace pictures come to us from a customer in Rancho Mirage just east of Palm Springs California.
The FireGlass in the fireplace is Bronze Base Glass FireGlass with Bronze Reflective Base Glass on top. The original burner was kept as it worked just fine. We are also cladding the bras with brushed stainless steel and we will post the pictures as soon as we get them.
This direct vent fireplace comes to us from Venice Beach California.
The house was under construction, so please excuse the debris around the fireplace. If you have any questions on your conversion please send us pictures and we will help you convert your direct vent fireplace as well.
We didn't change the amount of fuel (btu's) being burned just the way it looks. Flip the switch, the ignitor lights, allowing the gas to come up through the burner and the pilot light lights the gas rising from the burner below. As for the doomsayers that tell you this can't be done, Oh Well! Most fireplace manufactures will tell you this will void your warranty. But you need to actually read the warranty to understand what they will or won't cover. The person telling you this at the factory, ask them what the warranty actually implies.
We have read many of these warranties and they won't cover the fireplace anyway. These warranties were written by attorneys to keep the liability from the manufacture and lay the blame on the consumer at any expense, no really read one.
The next "B" vent or Direct Vent fireplace is from Mark Basillus. He sent us great step-by-step pictures. Starting with masking off the surrounding area getting ready for the heat resistant
paint!
He used some Red Paint and added Starfire Base Glass fireglass, with 2 lbs of Clear Pyrite Base Glass, and 1 lb of Clear Diamonds. We did a few special effects as well.
Here is what Mark had to say:
Ed,
Wanted to share with you the photos of our finished conversion to FireGlass.
We are really pleased that we decided to paint the inside of the fire box
red. That coupled with the glass had made the fireplace a focal point to
our living area!
Mark Basilius
[mailto:MBasilius@evgvikings.org]
One thing to always remember about Direct-Vent fireplace conversions is to NEVER increase the amount of fuel that your fireplace was designed to burn.
WOW! look at these nice logs, aren't they unique and beautiful? NO!
However, in looking at the burner it appears that it would work just fine.
Now we add Bronze Rust Copper Base Glass FireGlass with Gold Base Glass FireGlass on top.
Now you tell me, what looks better, logs or glass?
We are going to show you how to transform your direct vent fireplace into a real attractive fireplace. Here are some pictures sent to us from our customers, who have gone through the conversion process.
Has anyone ever said "Nice Logs"? I don't think so. The key is not to change the amount of gas going into the fireplace, so don't change the regulator.
The thermo coupler (heat detector) will be raised to the surface to insure it will still work.
Drop in a new burner, or use your existing one. This fireplace conversion used Gray Base Glass FireGlass,
Gray Reflective Base Glass FireGlass and Clear Pyrite Base Glass FireGlass.
The fireplace below is in Beverly Hills and is also a self install direct vent fireplace. This fireplace was filled with Gold Base Glass FireGlass and topped with a few pounds of Platinum Base Glass FireGlass. The old burner was removed and a new bottom plate was installed.
Test the burner and thermo-coupler.
The Gold Base Glass FireGlass was added over the crushed lava rock. And there you have it, fire! If your installer does not
understand this then have then call us so we can guide them through the process.
The next fireplace pictures was installed by our customer Ken Kenoyer. He constructed his own pan for his Direct Vent Fireplace conversion with our supervision. We will go through the steps to complete his installation. The glass that was used was Starfire Base Glass FireGlass, Red Topping and Red Topper. We will explain as we move forward.
Below is your burner system that came with your wonderful Direct Vent Fireplace and logs.
Below is a pictures of your pilot light system
We'ved removed the "stuff" and exposed the pilot and gas connection. Royce built a pan to fit the fireplace.
Below he cut the pan out to accept the pilot light. Connected the gas line. Test the burner.
Pour the fire glass and you're done! If anyone has told you that you can't convert a direct vent fireplace then these pictures and project don't exist! Just because they don't know what or how to do it, doesn't mean it can't be done. The glass face is back on and it looks much better. A very nice and simple self installation!

Click "HERE" or on the picture to see what and how we made this project for the Fleur's!
Alberto Stevans Corten Steel Surround and Direct Vent Conversion

Go To Page 2
See this site also:"http://FireplaceGlassDirectVent.com/Home.html"