Welcome to Our Famous
"How NOT To Do It Page!"
"Just when I thought it couldn't get worse, I get more catastrophes!"
Please be careful when inventing and or working with any explosive gasses.
Watch to the end, terrible!
Here is recent CAKE TAKER!:
From: Jennifer Sedlacek <sedlacekjenn@gmail.com>
Date: October 23, 2016 at 8:36:35 AM CDT
To: Dan Claxton <danclaxton@cox.net>
Cc: Don Sedlacek <sedlacekdon@gmail.com>, Jason Smith <jason.smith@fbfs.com>, Matt John <makej4@msn.com>, Cory Dillow <cwdcontracting1@gmail.com>, tonydillow@yahoo.com
Subject: Fire pit Explosion (Claxton Fireplace Nebraska)
Dan,
At our Husker Party last night, our fire pit built by your guys literally exploded. If you recall, last time they were out they installed the new star gas burner. Luckily the three guests sitting on that side wear not injured but the patio furniture was. We turned off gas and put fire out with extinguisher. Need you to come out, assess, and fix.
I got a ton of opinions on what was wrong from, no ventilation or drainage on sides for moisture to escape, fire features constructed with standard concrete masonry units contain aggregate that can overheat and explode, to anything propane is that it must have a pilot burner. Otherwise the heavy propane gas will accumulate in the fire pit and then explode when you light the burner.
In any event super scary!
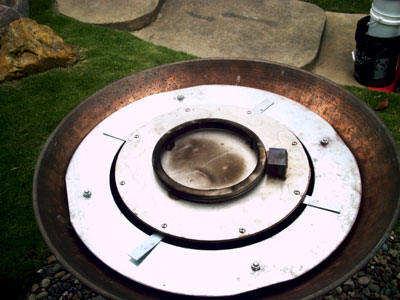
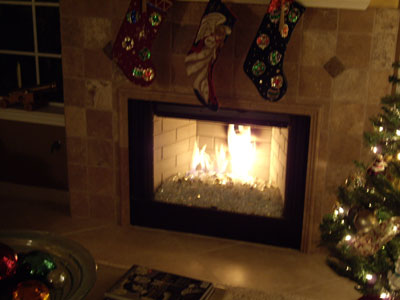
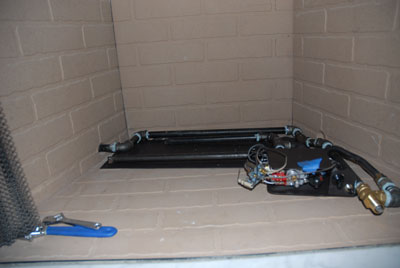
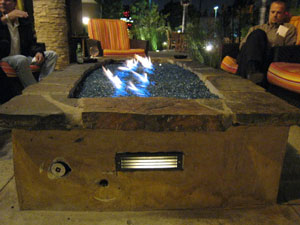
The image below looks like a great idea aesthetically, unfortunately its the equivalent of welding your car's hood shut. Meaning that if repairs are ever needed, you'll have to do one hell of a work-around to get to the controls.
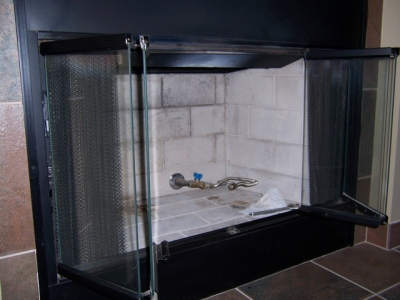
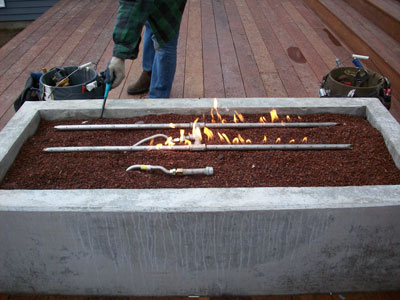
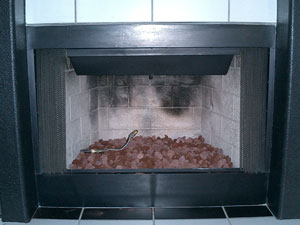
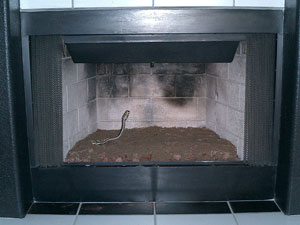
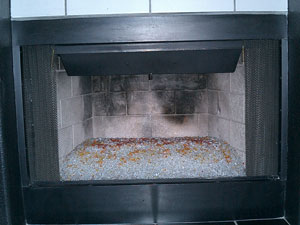
These next few pictures are of failed attempts of propane fire pits. I will explain as we move forward:
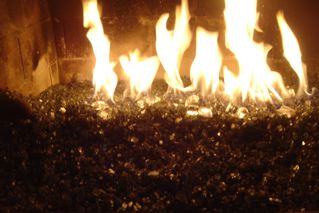
When propane collects and then detonates, this is what you get!
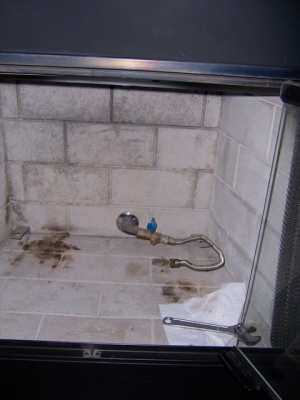
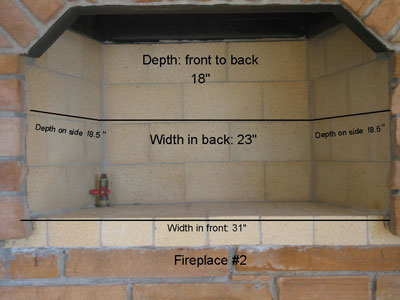
Look at the bottom of the pit, see the valve? This is a typical shut off valve, not to be used for propane.
Propane requires a safety valve, pilot light or thermocouple, air mixer and venting underneath, if you violate these requirements, you too can send us pictures to post.
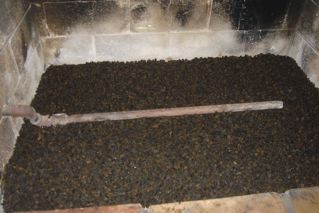
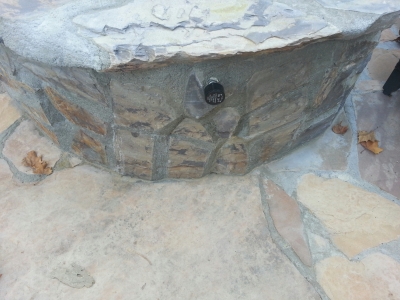
Below is a typical shut off valve, not a valve to be used for propane (maybe for an emergency shut off). I find companies out there selling these for use with propane with little to no concern for safety (your safety). If the flame goes out, the safety portion of the valve turns the propane off from flowing, hence "SAFETY"!

Story from the consumer:
Hi Ed,
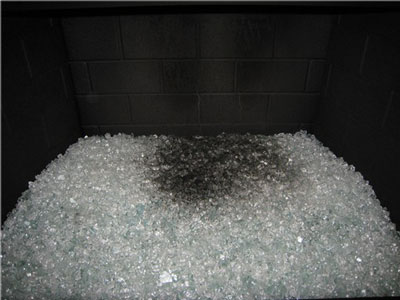
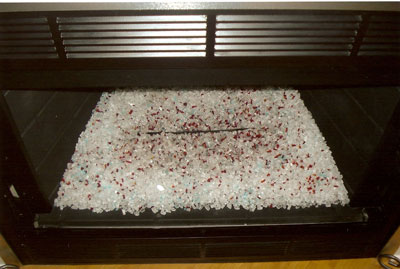
No doubt I just triggered the N.S.A. to read this email by the choice of words in the subject. Anyway, my husband and I build a cinder block propane fire pit, and at our inaugural lighting, it exploded glass charms and lifted the "pan" (cement backer board) from its position and even blew a hole out from under the fire pit. My 8 year old daughter had just stood up and walked away a few seconds before she blew. It was so scary, but thankfully no one got hurt. I know now that propane sinks and essentially it was building up under our pan and finally, boom. The question is, how do we fix this? We have this thing already cemented and the gas lines running through pvc pipe, between the tank and fire pit. We have a key on the pit as a control valve.
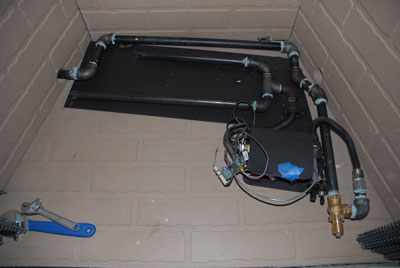
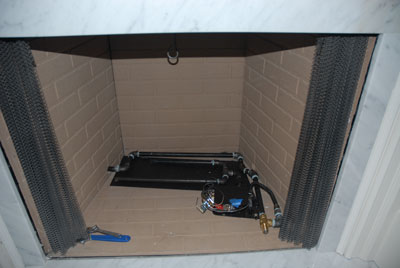
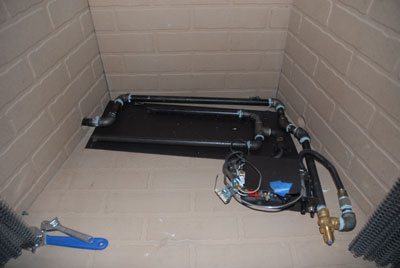
The inside is simply exposed cinder block and a line that runs from the propane tank to the control valve with the key and then a line from that up to the T burner.
Below are photos of the kit we used and our fire pit post disaster.
Customers picture on how to make an explosion:
Coming soon..................
______________________________________________________________________________
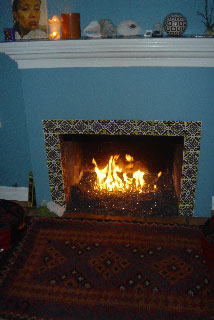
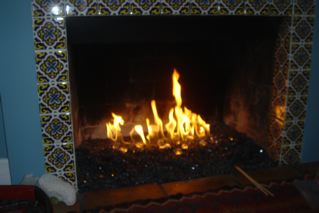
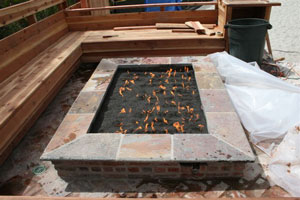
Looks nice! There he is and predicting which way they will go! NOT!
If you don't know what you are doing, don't do it! We are here to help.
Luckily no one was hurt. The fire pit filled with propane and then the terror exploded!
No valve, no venting, very poor false bottom, no drainage, This project went sideways.
__________________________________________________________________________
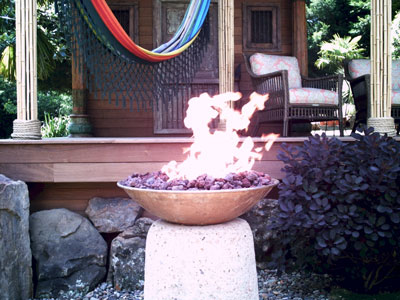
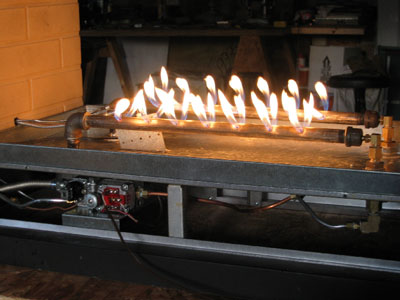
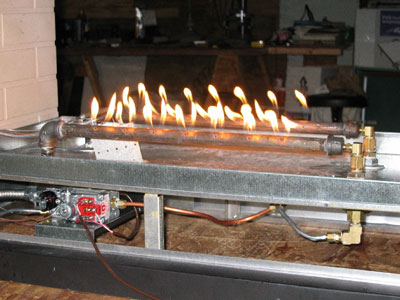
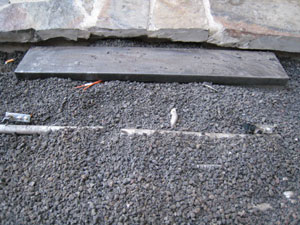
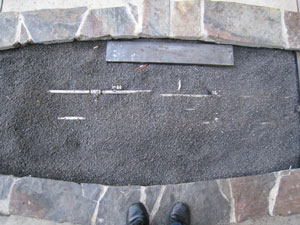
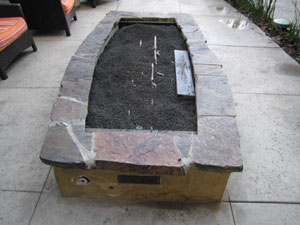
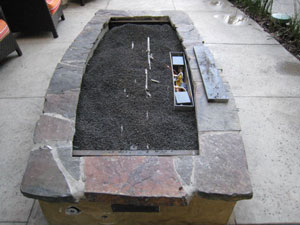
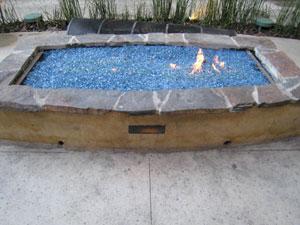
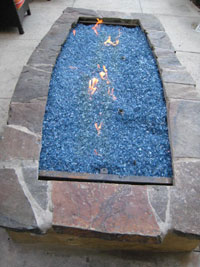
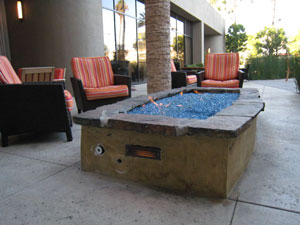
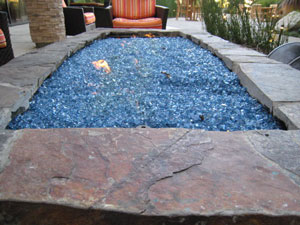
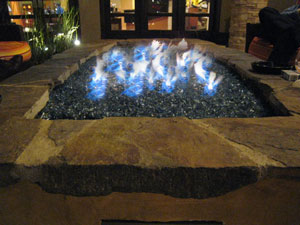
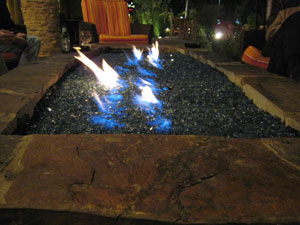
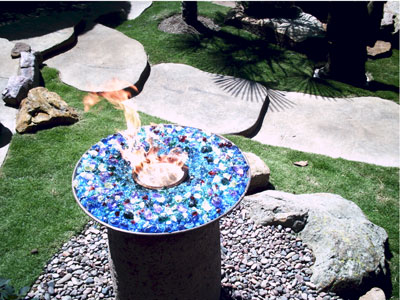
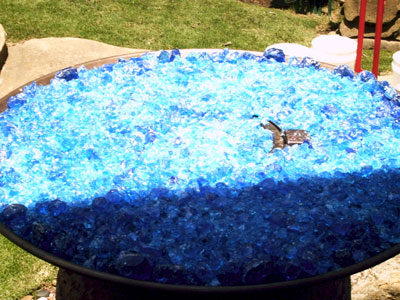
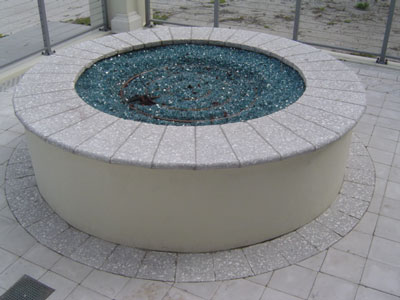
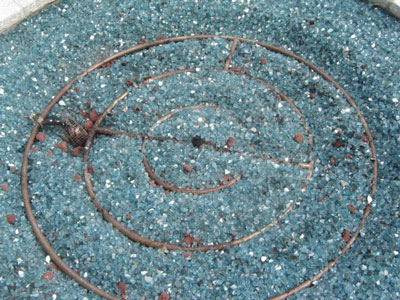
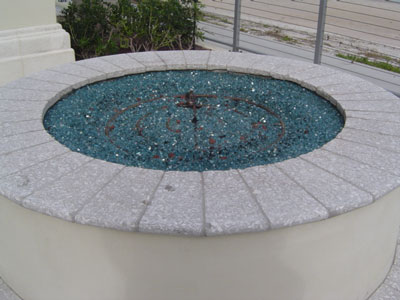
A natural gas fire and water fountain feature that came short of great. The burner system was configured in an interesting pattern, but as you can see by the small flames, it didn't have the power to properly ignite. And as reported by the customer she had to manually light each flame one at a time! And the best part...the flames would extinguish if the wind blew too hard!?
We will be helping them fix the problem and hopefully we will have photos of the issues corrected. Such a pretty water fountain needs an equally great fire pit.

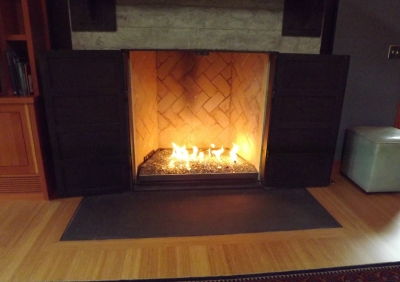
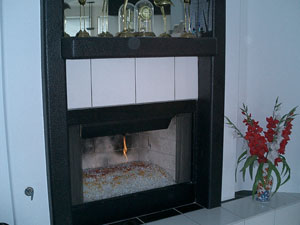
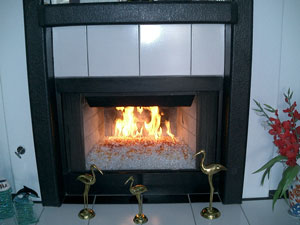
PNC interior designs was trying to install a fireplace propane pan, however like we so often see they were given bad parts and bad advice. So we stepped in and corrected the issue with the propane pilot system and repainted the fireplace with the appropriate
paint.
Once completed, we provided them with a vast collection of products,
1/8" Clear Base Glass,
Black Reflective Base Glass,
1/4" Starfire Base Glass,
1/2 Starfire Base Glass,
1/4" Ford Blue Reflective Base Glass,
1/4" Clear Base Glass,
California Gold Base Glass,
Ice Ice Ice Topper,
Steel Blue Topper,
Opaline White Topper, and
Black Magic.

Michael had a great custom fire table that needed a marble top; which we happily provided.
Along with some
1/2" Clear Base Glass FireGlass.
However, when we heard back from Michael we were surprised to discover that the marble table top had been destroyed and that it had actually been his 3rd one!
The reason being, the existing propane system was not modified to safely and cleanly burn FireGlass. So we proceeded to remove the 3rd broken table top and rectify the system to better insulate the fire form table and prevent any further cracking.
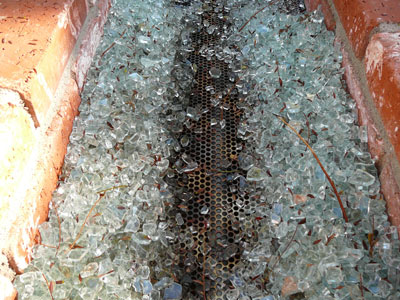
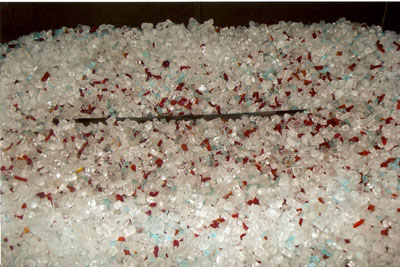
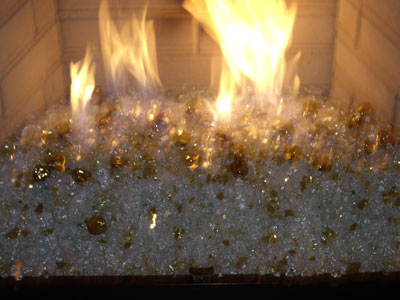
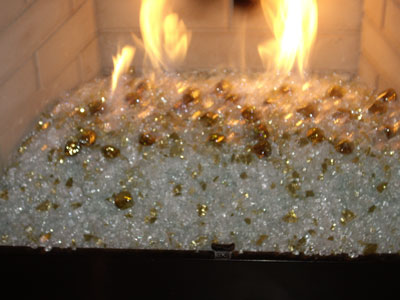
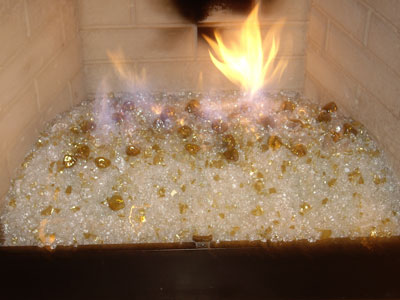
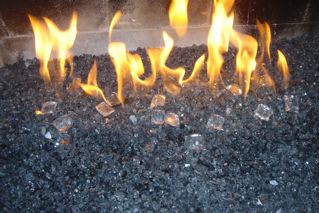
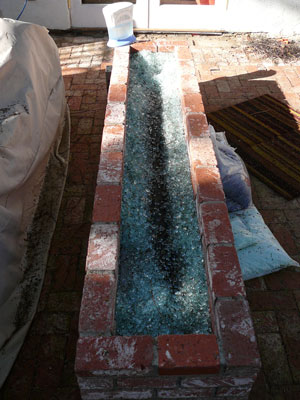
The issue below first begins with the wrong type of glass. This is simply broken tempered glass, that is not tumbled (you can tell by how wide the pieces are). And since its not tumbled the gas and consequently the fire won't defuse properly. Creating too much concentrated heat; which ultimately damaged the fireballs.

Were referring to this project as "the Arlington Keg Disaster."
The major issue was improper venting which super heated the bricks and glass blocks causing uncontrollable vortex fires to arise.
You can see the soot build-up caused from the uneven fire pattern.
So always make sure you hire someone who knows what they are doing, as this is so often the case when you don't prototype.
These fire table pictures come to us from Ivan Grace in New Zealand. We supplied the parts and imagination and he constructed one very nice wine barrel / fire table for his outdoor bar.
The media used was Starfire Base Glass. And Ivan thought ahead and also made a nice protective cover for his pit.
And from the looks of it, it was plenty warm for his wife. I guess they drink a bit differently in New Zealand?
There is nothing wrong with this project, but......... More clothes are required? What do you think?
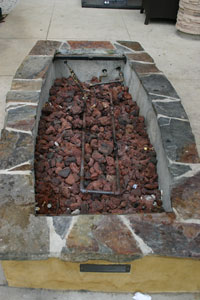
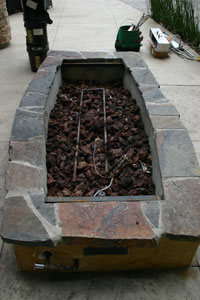
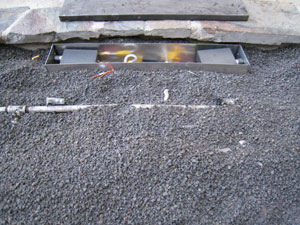
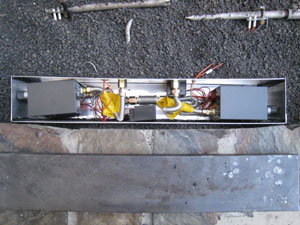
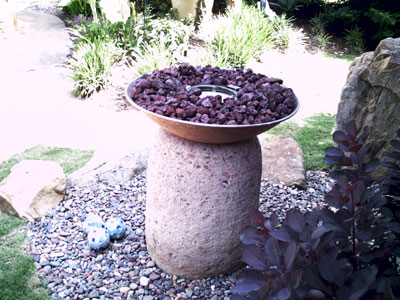
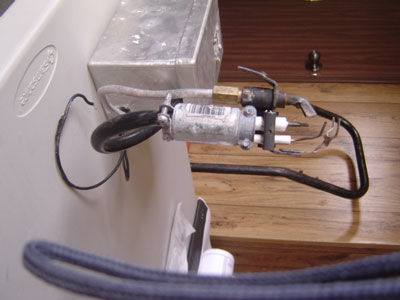
We've been seeing this prefabricated burner units lately. And though easy to work with, there fatal design flaw is they get too hot! Also if you ever have to service the unit, you'd have to excavate the whole unit out in order to services it!?

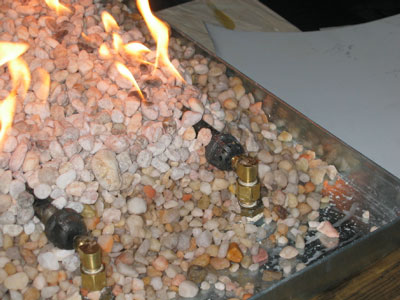
Joe Ramirez contacted us with a few fire pit problems, which we helped him fix. When building a propane fire pit, keep in mind the following:
- Don't put your controls under the base plate, you want to make sure that if you ever need to service the until you will be able to have access to it.
- The Air mixer needs to be located in its proper position so that base of the fire pit wont fill up with gas and create a bomb.
- Again air ventilation is critical when it comes to propane.
Here is what Joe had to say...
"Were all good, I spoke to Morgan very helpful, you got a great crew. Works like a champ. Thanks again." 
This fireplace may not seem so bad from this vantage point, but the problem is revealed once we see inside, just look below...
Here we can see the inane electronic ignition set-up. It doesn't take an expert to determine something isn't quiet right here...
But apparently the first installer managed to convince the clients that this was OK!?*#
Suffice it to say we had to start from scratch and help them re install the entire system - so that the system wouldn't be located in the fire!!!
Here's a particularly beautiful mess. This propane fireplace comes to us from Seattle Washington.
Not exactly sure whats surrounding the propane pan, but what is clear is though, is that the flame output is pathetic! And that the glass has been destroyed.
Here the old pan is removed and the fireplace is prepared for the new pan by creating a cardboard mock up.
The new pan is installed.
And the
Platinum Base Glass FireGlass is added.
Ignite and enjoy a clean burning propane fireplace.
Here is an example of not only the wrong type of glass but also not enough FireGlass and the wrong type of paint. Yes, you saved $200, but low-and-behold when you call back for help, there's no address on the website and no one returns your phone calls nor replies to your emails!?
Surprise!
First it had to be repainted with
the right type of paint. Then sand base is added to raise the burner to be level with the gas stub. The burner sits comfortably atop the sand and then
Clear Base Glass is placed beneath
Starfire Base Glass FireGlass.
Much Better! Moderustic FireGlass, warmer, cleaner and of course beautiful.

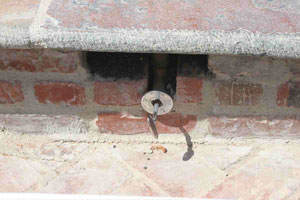
Here is a uniquely brilliant piece of stupid. The professional installer put the gas valve inside the fireplace!? You'll notice the blue valve, gee I wonder how long till that melts???
Kathy K. had placed her burner to far back and as a result got a lot of ugly sooting on her wall. So when started to work with her on her new Custom Surround we explained that her fireplace burner should be closer to the front so to avoid this again.
To ensure an accurate fit and design we guided Kathy on how to build an inexpensive cardboard mock-up.
The taped area represents the frosted glass, and the cardboard the brushed aluminum.
This gives both the client and us, a good general idea of what to build and what it will ultimately look like.

And here is the finished piece installed, freshly re-painted and burner installed in the right position :)
Corey B. wanted an electronic ignition for his fireplace, and though one could think that an IPI for a fireplace could go in a fireplace...I would seriously advice not to do it!!!
Suffice it to say it melted.
The pictures below demonstrate what had been initially done, that is, the electronic ignition system wrongly placed within the fireplace.
Here is an almost perfect install. A bed of Bronze Base Glass and Black Base Glass with 2lbs of Clear Diamonds a top.
But can you spot why this fireplace made our "How Not To Do It"??? Well take a look behind those beautiful flames at those ugly unpainted dirty walls! A near perfect job...
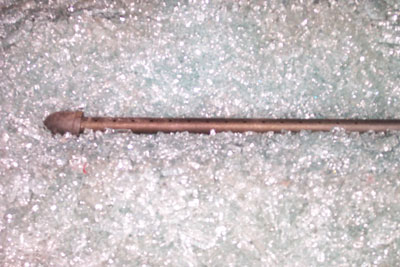
I've included this picture of a single pipe burner & pan since it's a typical type of fireplace burner; that is a complete rip-off!
This meek little burner can range from $180.00 to $240.00, while our standard Double 18" burner for $69.25 outputs FOUR-TIMES MORE FLAMES!!!
Don't fall pray to this non-sense and give us a call 909 989-6129 or buy on line here.

An elevated propane ribbon burner in Mexico gone wrong. Burner went bad due to sub-surface burning, resulting in soot and deadly carbon monoxide.
We modified the system, fixing the soot and carbon monoxide issues. However, the clients decided to keep the (un-determined) type of blue glass in the fireplace. Which we can't tell if its recycled? But hey if your interested in it, we can call the Mexican glass authorities ;)
Here is one more "Ugly Glass"
picture! This is actually displayed in a fireplace shop in Temecula, California! You be the judge. This is why we take soooo many pictures to show what we actually supply!
The next valve location is just ridiculous! Not only did they put one valve in the fireplace, they installed two for some unknown reason! There is a Teflon guide/ seat inside of the valve which will MELT when near fire!!!!!! If you know this plumber, his father is looking for him (son of Satan!)
The next pan burner is almost beyond belief! They actually tell you this is how it has to be. Don't be fooled by lies. It has to be what you want it to be and look like you want it to look like! This is their "Sand Pan", it looks like a bad cat box to me. But what do I know?
Not only do they have no class or taste, they don't even know how to paint.
A bad paint job is just that.
The manufacturer didn't even try to conceal the controls whatsoever!
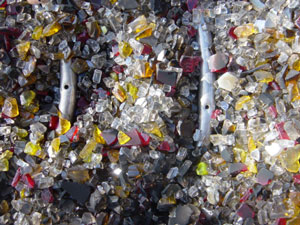
The fireplace below has several issues including some weird type of broken bottles/ jars I don't know what.
I enjoy a good competitive field but don't compete with scrap/ trash glass! Don't even go there. If you think this is fine, then go for it!
So let's not even clean the outside of the fireplace. Notice the bottom of the fireplace, someone has been throwing in some sort of liquid???? Probably alcohol? Who knows.
If you dress up a pig, it's still a pig!
This is a 40 40 fireplace. If you are traveling 40 MPH and you are 40 feet away it will look good!
The reason we received these pictures was the customer was upset with what he was sold from????
They asked what to do to fix this mess.
Customer support is just as important as price but if price is all you have, then you have nothing. Don't forget about quality, customer support and product appearance.
Below is just one very ugly fire pit sent to us by a handy man in Las Vegas,of all places!
Below is what we consider one "crappy" wood burning fire pit! believe it or not, we were asked on how to convert this to burn glass. They were shocked when we told them the glass does not burn, it fueled by gas. Then they asked "Gasoline?" this is when I hung the phone up.
Below if you see this being installed in your fireplace, through the installer out of your house. Use a stick, broom or what ever you have close to you. He does not know what the heck he is doing! The valves are never to be inside of the fireplace! Ever!
AGAIN! Remember never to put a valve in the fireplace. How will you turn it off????
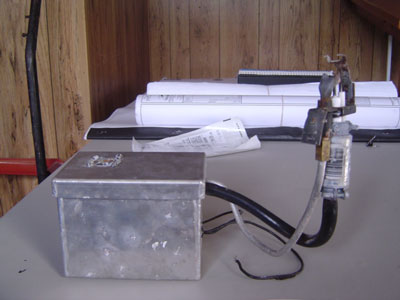
This is a good one, the customer asked what the best way is to turn it off when it's been on for a while???????????? The plumber left it this way. A fairly nice fire until you try to turn it off! There is a plastic valve seat located inside of these valves and when it melts you will have an eternal flame (on forever)!
This is a simple solution:
Key valve in a metal protective box. I know, too simple.
This is a do it yourself product. So let's see how these folks did?
The fireplace below is a wood burning and it can also be used for propane. At first glance do you notice anything wrong?
How about the abundance of soot forming on the front of the fireplace? Remember you also breathe this crap. There are a lot of "Wannabe Purists" thinking wood burning is the answer, NOT! It's actually called pollution, no really. Now isn't this a charming look! Black soot and smoke all over the front of your fireplace and walls.
The fireplace below is in Newport Beach California. Beautiful Home, View, Grounds, Beach/ Ocean View. and they saw nothing wrong with the self installation. This is a typical installation which you would use a sand base under the glass and bring it up to the bottom of the gas stub out. Then you cover it with glass.


Everything else looks nice except the gas connection. I wonder what they tell everyone who asks "why is that there"? 2" of sand would of fixed this situation.

The pan burner below is a typical problem we see almost on a daily basis now. There are several companies selling you pan burners with glass in them. What they don't know is why or what happens or how does that happen. The flame burns on only one side, why is that? Because there is more to just pouring glass into a pan and hoping it works! The most common answer to customers is "That is just the way it burns" that's as good as "Stupid is as Stupid does". We will explain as we go forward:
Here is your average pan with glass.
Self Installation GONE WRONG!
So why does it draft to one side? I'm sure you will get many answers but the right one, it's made wrong! Every failure is a success, and their failures are our success. Our pans don't side draft! What is sad they can't fix what is wrong because they don't know how.

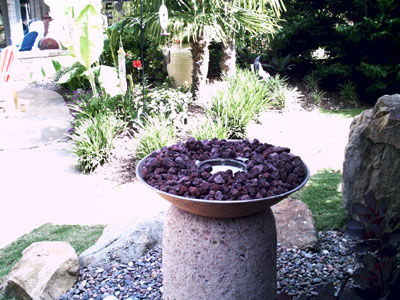
The fire pit below has a
Azurlite Base Glass with
Aquamarine Blue Topper,
Hyacinth Topper,
Citrine Topper and
Copper Ruby Red Topper. This is a propane fire pit in Texas. Our dealer installed this glass and explained to the customer to eliminate the soot from the propane we had to lean the mixture with air. The customer asked the burner manufacturer to come out and inspect the fire pit. The manufacturer told the customer the glass was defective and this was causing the soot. The manufacturer didn't even know how to get a clean burn on their own product! Needless to say the fire pit is still producing clouds of soot and the customer now knows the manufacture didn't even have a clue. The smell in propane is an added oil to the liquid propane so it can be identified. The oil will still burn off as the fuel is used but we lean the fuel by introducing 6 parts of air to the fuel to virtually eliminate the soot from the fire. Below are before and after pictures of the propane fire pit.
As you can see below the fire pit was creating soot long before we even started. The glass had nothing to do with burner as the burner was in the middle of the glass. The manufactures of most of these propane fire pit and fireplace burners don't even have a clue on what they are doing so please be careful. In this case the manufacturer didn't know how to get a clean burn so there fore he said it can't be done! You be the judge, what looks better?
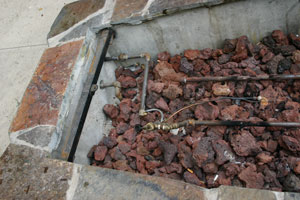
The propane fire pit below is in San Diego California. They had several issues which we resolved but they didn't listen and they don't even use the fire pit because of: Black soot from the propane, they refused to listen about our venturis/ air mixers. No safety valves installed for the use of propane. (thermocouple) (heat switches) Steel burners tend to rust outdoors especially at the beach area and when it rains the rust runs out on to the concrete deck area. You should use stainless steel or use a cover when not in use.
We recommended a series of burners to equalize the flame but again they knew much better and had little to no flame, boo hoo!
The valve used is a good safety valve when using propane and typically used with natural gas. But this is the wrong valve to use with a propane fire pit.

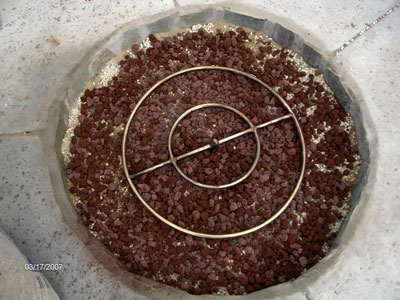
Above you can see the rust forming and below you can see the soot on the lava rock. This is not recommended to breath unless you are on death row.
Aside from the soot, small flames and carbon-monoxide he's got a nice fire pit, NOT!
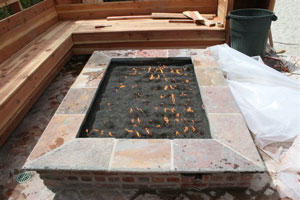
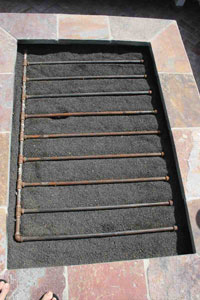
The fire pit below had a few issues:
Never use a screen of any kind! A cover is recommended for long term non use. A drain is mandatory under your filler/ glass! Good idea, bad follow through!
With a screen under the glass which creates an empty cavity for gasses to collect you will be sure to have a fire ball every few minutes, while you may consider this fun it is also unsafe! When you don't cover your fire pit every thing that can fall will fall into your fire pit. Fire pits are magnets for falling debris. If you don't install a drain the water will sit inside and turn a funny color of green and start to smell like yuk. When you finally turn the fire pit on the fire will draw all of the molded stinky water in your fire pit out for you to enjoy, no really! Don't install a drain and you will see what I mean. If you don't have a drain at least make sure you have your cover on at all times as this will keep moisture out as well.
The fireplace below was finished with
Starfire Base Glass and Topped with
Red Topper,
Aqua Blue Topping and a darker
Blue Topping. The 2 problems were the gas pipe was visible and soot had fallen from above. This was an easy fix. We sent them a few pounds of glass, they buried the pipe deeper and called a chimney sweep to clean the flue. Now the fireplace looks and works great.
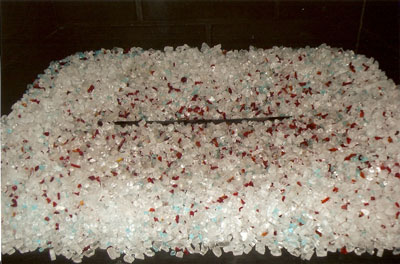
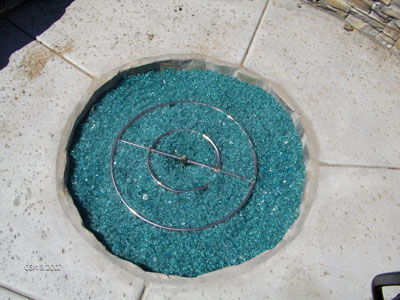
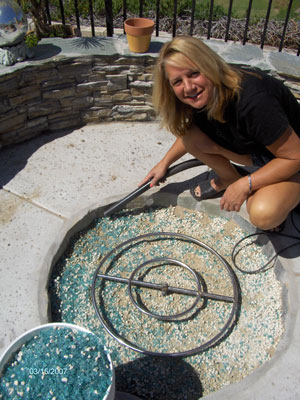
The fire pit below is
Azurlite Base Glass and
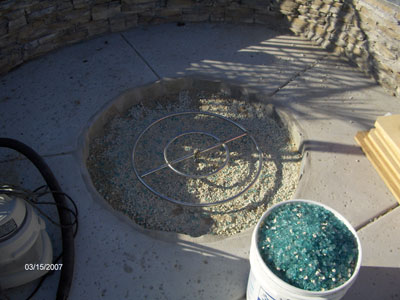
Azurlite Reflective Base Glass and the result of not using enough filler to allow the glass to cover the ring. As you will see here Maria had to empty and sort here glass because it was mixed up with her filler. All is well now but one heck of a lesson.
The filler is in and under the ring
When you don't have enough filler, you can't cover the ring.
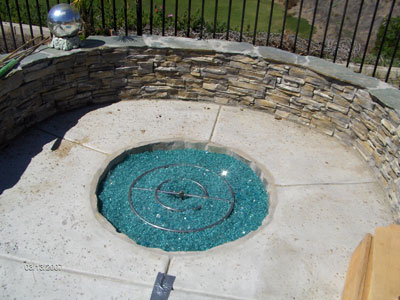
It almost looked good, not!
Here's Maria finishing removing the glass which later she sorted about 300,000 plus pieces apart!
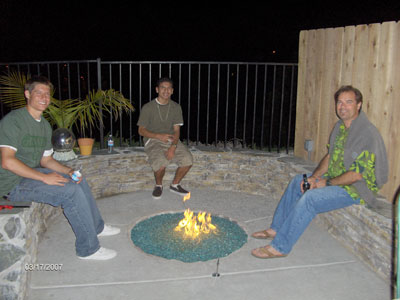
Here we are finished and happy once again. Simple mistakes are difficult to repair.
The fireplace below is in Palm Desert California and was a self install with a
crushed lava base,
Clear Base Glass over the
lava,
Starfire Base Glass on top of the
Clear Base Glass and Topped with
Amber Diamonds and a splash of our
Gold Base Glass . It looked great until they found the burner was too close to the back which burned the back wall. I don't know if this was repaired as we did send paint and instructions on how to prevent this in the future. The fireplace looked great except for the "skid mark" on the back wall.
Above it still looked good here!
About our
Diamonds, they are made of crystal and when you see them in the fireplace you actually see the fire reflection reflecting the flame backward as if the
Diamonds were melting from the inside.
The fire pit below had twin stainless steel burners installed and again we here the age old problem. "My flames are too small". What happened here is the plumber recommended a 1/2" line to be run to the pit from 80 feet from the meter, oops. With no volume you will have no pressure. The line should of been 1" to 1 1/2" to give proper flame height.
Since this was a wood deck with the plumbing underneath which was easily replaced, and yes the plumber took no blame because he said he didn't know better! So if you're not sure, ask!
You be the judge!
A single burner is fine if you don't want a larger flame pattern or if you're on a budget.
I guess if you wanted the burned look, then you got it!
The fireplace below is a failed attempt to copy our burner design. We even post pictures on how to do it and when you can't even follow instructions, well this is the result. It was not out processed and or tumbled glass which you can see it looks like someone threw trash glass in the fireplace and left the pipes exposed. I don't know what happened but I can tell you this looks terrible!
The burner was way too small, it was a single burner and the hole pattern was wrong, the pipes were exposed, it was a spotty paint job on the walls, the glass looked like a broken window and except for those few items, the fireplace was a nice fireplace, NOT! These mistakes are here to help you prevent these silly mistakes, and a few chuckles.
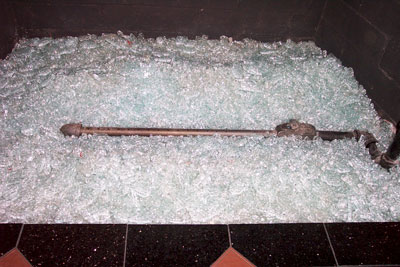
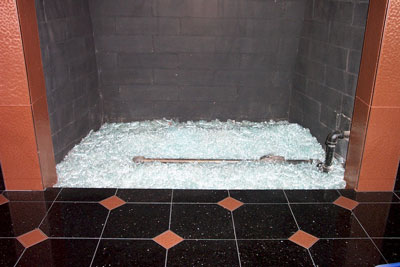
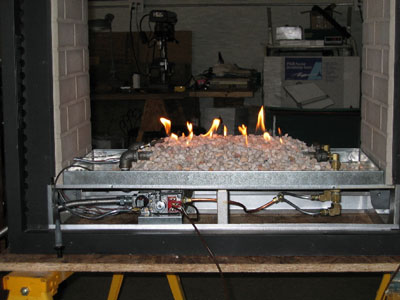
The fire pit below was another failed attempt in Nevada. They helped these customers design a propane fire pit with an electronic ignition (fair at best) and with the lack of knowledge about propane here is the failed attempt. The ring was to placed above the glass according to the manufacturer (wrong!). There was no air mixer/ venturi let alone calibrating for proper air mixture to insure a clean burn. The company would not even return any calls to the customer and we repaired the system and made it work properly. This home was on the beach in South Florida.

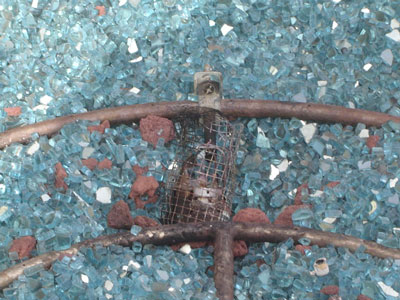
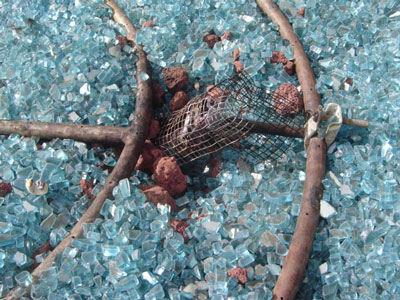
Several thing went wrong here, wrong filler (lava was too large), Bad cage design over the pilot light/ ignition, they buried the ignition system under the ring and glass, the ring was left on the surface, no air mixer, no customer support, the ring that was supplied was a steel ring for outdoors, wrong! This should of been a stainless steel ring and a strong recommendation for a cover because it was at the beach! We would of also given the option of a #304 stainless steel marine grade ring. We also manufacture our our rings as well.

The valve below was an easy install according to the plumber but after he leaves and you turn the fireplace on and only when its time to go to bed, you have the eternal flame because you can't reach in to turn it off. We see this all to often, so please send us your pictures and we will gladly help you from letting this happen to you,
The fireplace below is a
ventless propane and a failed attempt of making an air mixer. First if you put rocks in or on your fireplace they will pop out or explode because of their ability to collect moisture. It may be a fun party favor but not recommended in your own home. Second we want to help you convert your burners properly and safely. So if you don't take our advice or follow instructions someone can or will get hurt. The proper air mixers were not installed and they need to be away from the fire/ heat. Drilling holes in the pipe end is not considered adequate or even close to being right.
I don't know what happened as this person never contacted us again. If the house is even still there.
The fireplace below is the fireplace of "Bill" and he wasn't sure where the burners went. So he put them on top and as you can see he should of put them under the glass. (He should of stayed awake in class)
Bill ordered a rectangular pan and it would of looked better if we would of built a trapezoid shape pan to contour the fireplace. Bill did drop his burners under the glass. This was a
propane ventless conversion. Looks much better than those log thingies! Hopefully Bill will send us pictures of it finished and burning, maybe. We used
Starfire Base Glass in the pan.

The 4 pictures below are of a self install almost gone bad. This is a
ventless propane fireplace and if you look at the elbows in the first picture, they drilled holes to get air into the burner. It's a good idea but it could cause more issues than you can imagine. The air mixer/ venturi needs to be below the burn area where it can always receive fresh air and not in the burn area. Second the rocks it left uncovered will pop out into your room and burn what ever it comes in contact with. It's always a good idea to send us your project picture developments so we can monitor your mistakes and fix the issues before you move forward.
We don't know how it turned out as the customer never e mailed us back after we advised them.
This one is a simple fix. The ring of soot had fallen from above onto the glass below. Just remove the soiled glass, wash it and replace it. The soot build up is a direct result of burning Presto Logs in your fireplace. Also if you notice the back wall was slightly burned because the burners were too close to the back wall. The burners have been moved forward now and everything is just fine.
The fireplace below has some very bad plumbing! WOW. If you hire a plumber and you think there is way too may pipes, send us a picture and we will help you out of your mess. You take a look and be the judge.
We can fix any problem or issue provided you are willing. This was a fireplace that was not properly prepared and the customer didn't want to take the time to paint. You be the judge. The base that was used was
Starfire Base Glass and
Toppings of
Red Toppings and
Red Orange Toppings were uses. The fireplace looks good except for the lack of
paint.
The pictures above are of a remote control system we built with a safety pilot light system. We built the system for right hand connection and I guess the plumber didn't know his left from his right and tried to connect the unit from the left with a few extra pipes. That plumber was fired and a new plumber who understood what we wanted fixed the pipe nightmare for the customer and all is fine now
The fire pit below will show you how not to do it (bad plumbing) and how easy it is to install a battery operated remote control. The glass used was
Ford Blue Base Glass and we installed 2 = 44" stainless steel "H" burners.
In the pictures on the top right, do you see the plumbing sticking out of the pit? Well this was fixed, but not by the plumber that tried to install it. We cut a little bit of concrete and placed the valve in properly.
Above you will see a very poor attempt of a gas burner and valve.
The picture above has our twin remotes inside the box protected from the weather.
We covered the larger lava rock with our crushed lava rock to pour a 1 1/2"
Ford Blue Base Glass to cover the lava and burners. Unless you plan to cover your outdoor fire pit we recommend to use all stainless steel burners and parts to avoid rusting.
Once the glass covers the box, it just looks nice. To replace the batteries, move the glass on the top and the rest is simple.
The fire pit above is at the Torrance Marriott in California.
This fire pit was sent to us to convert to a propane burner and we found broken bottle glass in the fire pit. You be the judge. Please look at out Toppers and Toppings page and you will see we don't use trash glass, really! We are updating most if not all of our pictures of our products to show you what you are getting. There will be no surprises when you purchase our glass. Remember you get what you pay for and Imitation is the highest form of flattery! These companies must be in love with us!
This is not our glass! This is what we call recycled glass, trash! If this is the look you want, go for it!