Fire Pit Glass Gallery 7
Convert to FireGlass / Natural Gas or Propane
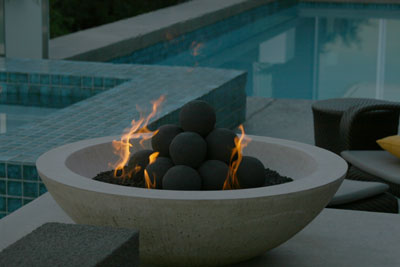
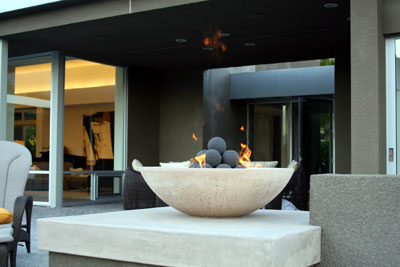
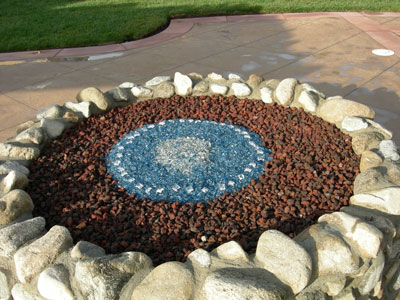
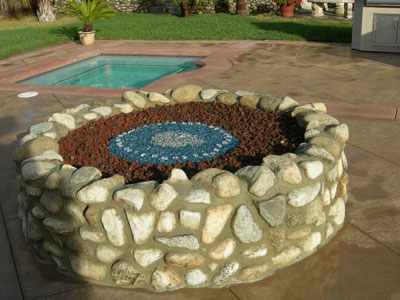
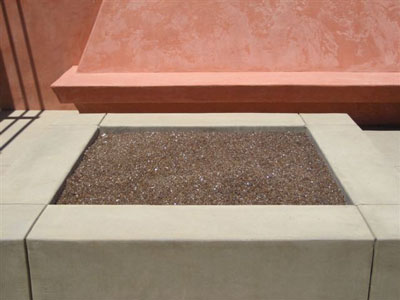
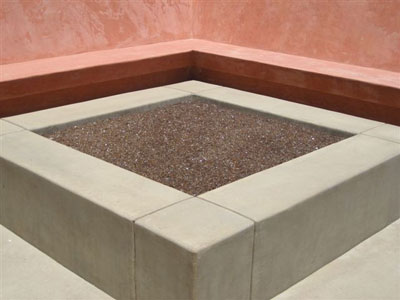
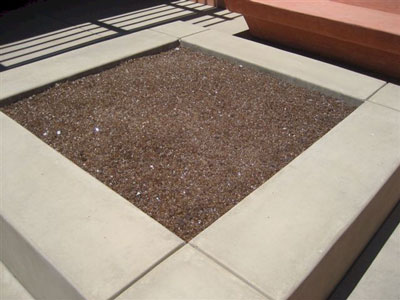
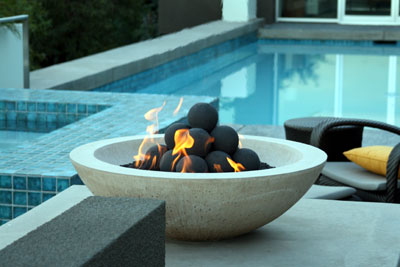
The fire pit below has 4" FireBalls over a bed of crushed lava rock.
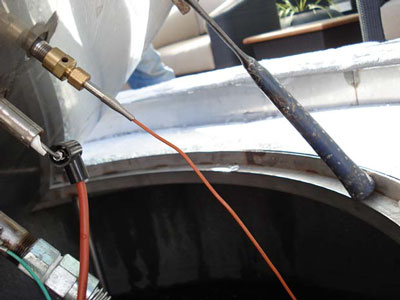
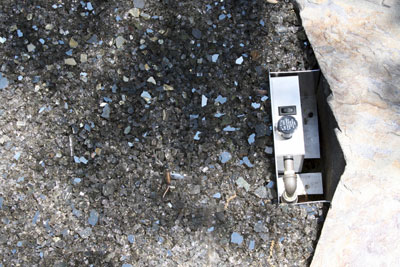
The fire pit below was build by Mike Phillips. First he ran a propane line to the fire pit area and then blocked his fire pit into shape. We use a FPPK (fire pit propane kit) in an aluminum pan 24" x 24" with a double 18" double stainless steel ring.The glass that was used was Gray Base Glass and Gray Reflective base Glass on top to add sparkle. Below you can see the placement of the thermo coupler and safety pilot light used for propane.
Below on the right side the controls were installed in the bricks.
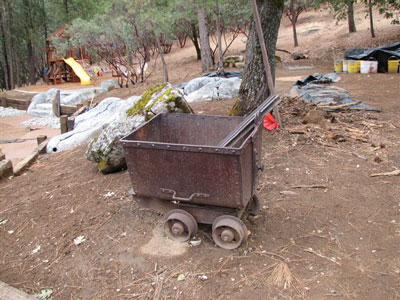
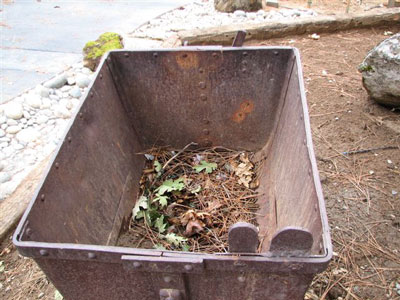
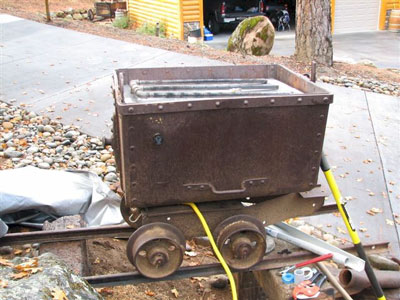
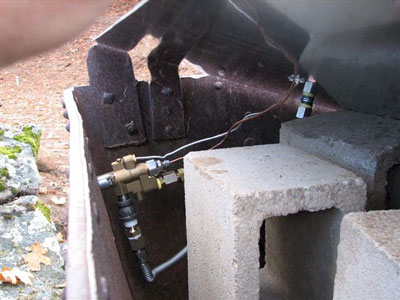
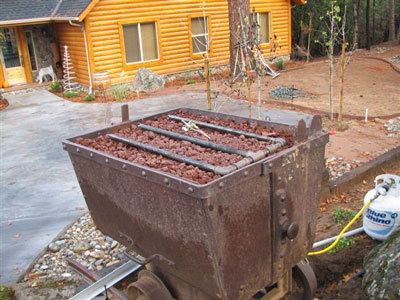
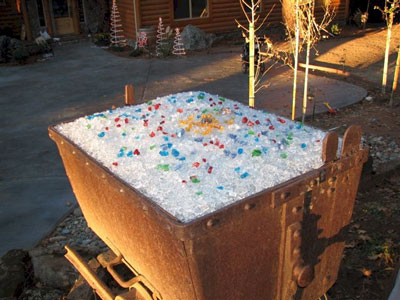
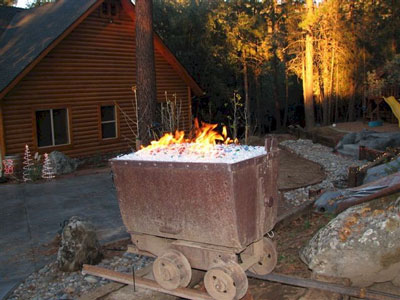
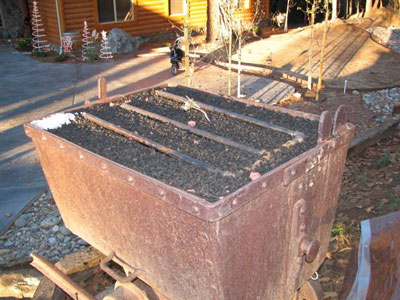
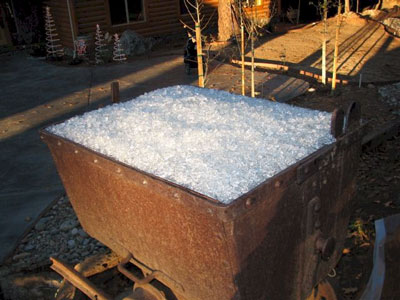
The fire pit below belongs to Mike DeVito in Northern California. When I saw his idea I was excited to help him create something new and wonderful. He took a very old mining cart in his front yard and we helped him convert it to a propane burning fire pit! Turned out pretty cool! Next he is getting a fire pit cover.
Here you see the controls, air mixer and thermocouple and pilot light lines under the base plate. You can use a larger (3/4", 1" lava) as a base under our 1/4" crushed lava as this will save you a few dollars.
Now we pour on the crushed lava to keep the glass from sinking into the larger lava. Add some Starfire Base Glass Glass.
 |
 |
We use a
FPPK (fire pit propane kit) with valves, thermocouple, pilot light and air mixer. The glass that was use is.
Starfire Base Glass over a bed of
crushed lava rock,
Yellow Amber Topper,
Steel Blue Topper,
Turquoise Blue Topper,
Green Tubes,
Copper Ruby Red Topper,
Ice Ice Ice Topper, and of course our
Diamonds in Clear, Pink, Amber and Blue. I think this is one really nice idea!
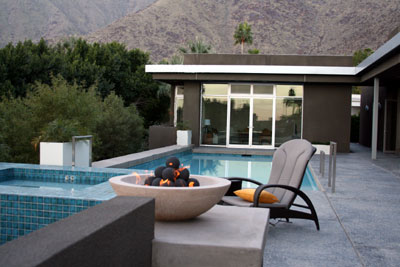
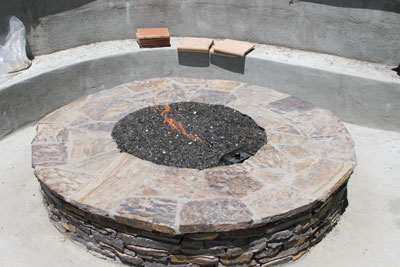
The fire pit below is in Palm Springs California. We use Azurlite Base Glass Fireplace Glass and a crushed lava filler underneath. There were a few issues which we resolved. First issue: Don't use polished Mexican Pebbles as they explode!
Above, second issue, the ring could of been bigger as we installed a triple 30" stainless steel ring. Below, third issue the plumber installed a 3/8" reducer, why? The gas line was 1/2", the ring is 1/2" so why did the plumber installed a 3/8" reducer? What the heck?! Anyhow, we fixed it by installing a 1/2" flex line and the pressure was back to normal.
We then cover with at least 1 1/2" to 2" of crushed lava.
And pour some Azurlite Base Glass Fire Pit Glass
The fire pit below has V Blue Base Glass, V Blue Reflective Base Glass.
And topped with Cobalt Blue Topper
The picture of the fire pit below was taken in Newport Beach California. The glass that was installed was Starfire Base Glass. One very nice backyard and fire pit!

In a stainless steel octagonal fire pit at the beach. If you take note a 1/2" piece of glass was placed on top of the fire pit for day time use. Below is where it all started.
The next fire pit is from Sandee Visintin and the glass that was used was,V Blue Base Glass, V Blue Reflective Base Glass, Aquamarine Blue Topper, Turquoise Blue Topper.
Here is what Sandee and Frank had to say: Hi Ed,
We love our fire pit, and so does everyone else who sees it. Your rock is gorgeous…
We keep a glass octagonal table top on it when not in use; the rock is always visible, even when used as simply a coffee table.
Thanks for your beautiful product and great service!!
Sandee and Frank Visintin

The fire feature was commissioned by Mark and Jair in Long Beach California. The very top bowl was filled with Ford Blue Base Glass Fire Glass and the bowl below has 300 fibers installed. The fiber optics changes colors of can be stationary or change colors at will. The water in the fiber optics bowl spins and spills over onto the rock base.
We will explain as we move forward. First the utilities were ran underground (18") and this is generally permit required work.
Second, the pond liner is installed and then we drop in our feature. This feature was powder coated at the request of the customer.
Below is the NEMA enclosure to house the electronics and fiber optics.
We installed 3 = 2,700 GPH (gallon per hour) pumps to power the flow of water. We turned each pump down to accommodate the proper water flow.
Level the top of the fountain. You can see the NEMA box exposed, it will be covered with stone as soon as the electrician finishes his switch installations. There will be one switch for each of the 3 pumps, fiber optics color wheel and under the top bowl we installed lighting to illuminate the rock below in the the evening.
We can build these fountains for you to install yourself or we can aid you in building your own. We can help you design and or build your fire and water feature. Finished and evening pictures still to come!
Rose Harms built the do it yourself feature.
Here is what the customer had to say.
Hi Ed and Claudia,
Wanted to be sure I got the photos to you of our completed fire pit. Here are the steps we went through:
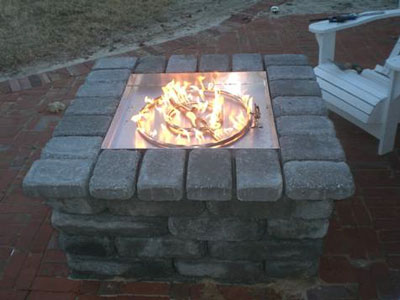
Bought the brick/blocks (no lip on the stones) from Lowe's, put in circle, 3 rows high.
Bought the iron fire pit at Lowe's and placed on and inside fire pit. -note -it is iron, so I sprayed it with HIGH HEAT paint, in Copper. Wow! got plumber to run natural gas from deck above (outlet for BBQ) and under the deck, ran down the deck post and he put in a Shut Off valve there. He ran a precise hole through the bottom off the fire pit to hold pipe for gas to the double ring burner (from Moderustic Inc of course) and it is stainless steel (no rust). At the bottom of the deck post is a flexible hose which goes over to the fire pit. It CAN be disconnected or even roll up and shove inside fire pit (after it is cooled).
Lit the burner to be sure it works well. We put in the 1" lava rock in the bottom of copper fire pit and then filled in the spaces with 1/4" lava rock. Should have used More! When we went to cover the burner we were short on the FireGlass. So we ordered more. Still looks beautiful.
Got rest of glass and made circles with the glass and it is beautiful. There are photos of it burning last night!! Lots of warmth on a typical cool Wyoming evening.
Brick: $200, Fire Pit $79 on sale, double ring SS burner $126, glass -about $250, gas line -don't know yet but guessing $200. Maybe $750-800 total. And -the way it is made, we could actually dismantle and move it. No mortar in stones. We are very happy with our fire pit and thanks to Ed and the gals
at Moderustic Inc, we were able to make the right choice for glass and burner. Thanks Ed and Claudia. Very knowledgeable and helpful. Could not have managed this without your guidance. We love being DYI-ers but directions are needed!! We appreciate all your help.
Rose and Doug Harms, Cheyenne Wyoming

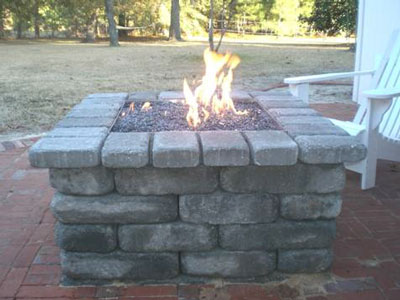
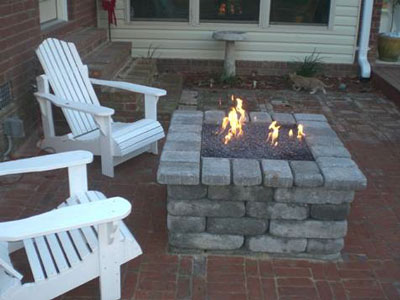
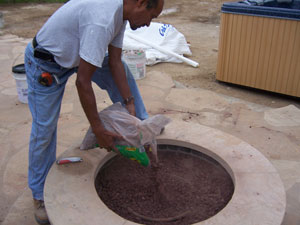
The pictures below are of a self install fire pit with crushed lava rock and a Clear Base Glass, 1/2" to 3/4" lava rock is use just to the bottom of the ring. If you want a higher center then pour a little more filler on top of the ring.
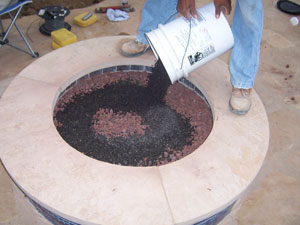
Now we will pour the crushed lava rock (1/4" to 3/8") over the filler as this will stop the glass from falling through the lava rock.
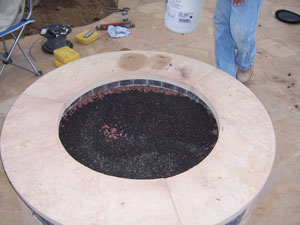
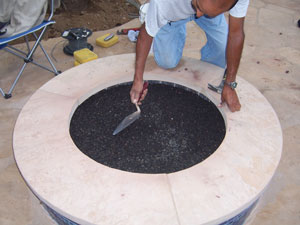
Finish shaping and pour the glass. This is a 36" fire pit which requires 56 lbs for a 1" cover and 80 lbs for a 1 1/2" cover. We used the 1" method, 56 lbs which as you can see works just fine and no you can't see though the glass.
The fire pit below has Azurlite Base Glass, 1/2" Azurlite Base Glass, Ice Ice Ice Yopper, Starfire Topper and Platinum Base Glass in the center. Lava rock was used to minimize on the use of glass to keep it in the budget.
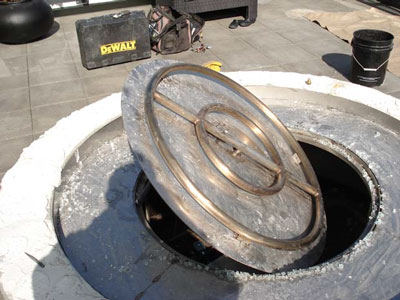
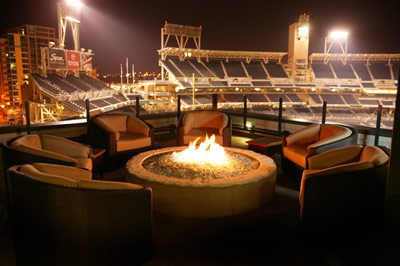
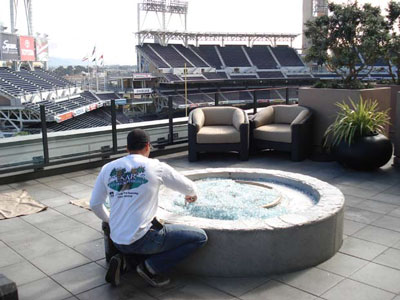
The fire pit below has an electronic ignition and clear glass installed. This is next to the San Diego Stadium Downtown San Diego at the Legends.
The fire pit below was built and installed with Clear Base Glass. Again by Cesar in San Diego.
The fire pit below has Bronze Rust Copper Base Glass and a hint of Bronze Base Glass added.
The pictures below will show you how to install a propane burner and valve in your fire pit without drilling a hole in the side of your fire pit with our FPPK (fire pit propane kit). This was install in Calabasas California with Bronze and Bronze Reflective on top. The fire pit has 10" solid sides which made this a good candidate for the FPPK to be installed on the inside wall. This is a propane fire pit and we do calibrate every valve to every ring we install to eliminate back flow and any problems or issues that may happen. We also install the proper air mixer to insure a clean burn as we eliminate the soot know to be produced by propane. If you have a propane fire pit you know what I am talking about.
The fire pit below is a mix of V Blue Base Glass and Azurlite Base Glass.
 |
 |
 |
 |
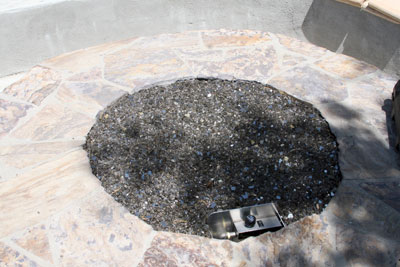
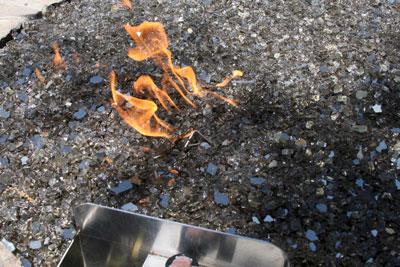
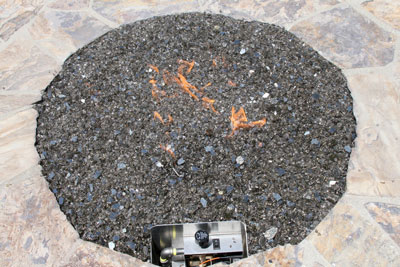
The fire pit below had the wrong type of burner let alone the location of the burner. The burner must be with in 2" of the ultimate top of the surface of the fire pit. Filling the pit with gas and then trying to light it? Nothing good can become of this. We installed a #304 stainless steel "H" burner, covered it with crushed lava (1/4" / 3/8") over the larger lava rock. This is what keeps it from trickling to the bottom. Them we topped it with
Starfire Base Glass. Then Eric is trying to decide which colors/
Topper he should add if any at all.
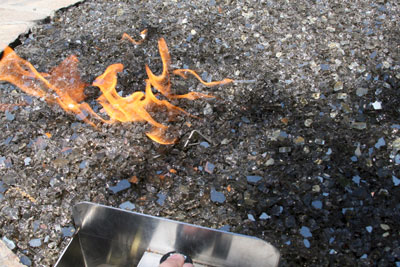
Wrong type of burner.
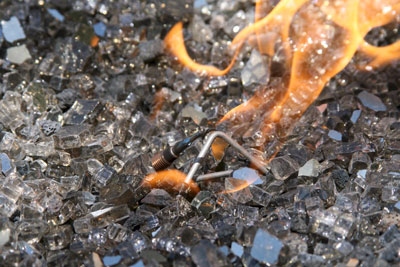
Our "H" burner below. Watch the flame pattern as the crushed lava covers the burners.
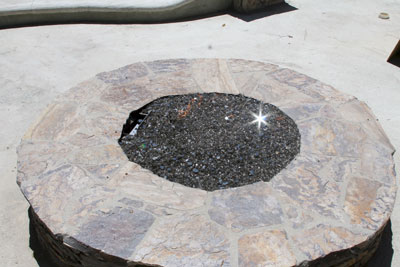
Now for the big decision, more colors but which ones?
The fire pit below (from Randy Cox) has a Clear Base Glass with Pale Cobalt Blue Topper and Aquamarine Topper for a simple but very nice fire pit. Below you can see the larger 3/4"/ 1" crushed lava rock as a base filler.
Below you can now see our 1/4" crushed lava to finish off the larger lava.
The glass goes in and you're finished!.
Randy installed a 22" stainless ring and when he took the picture he had the flame on low.
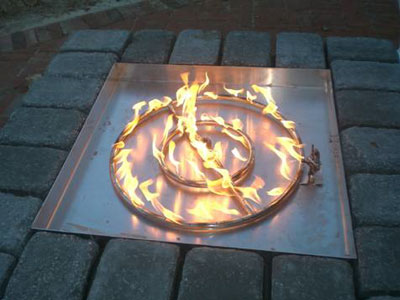
A Super Bowl Fire Pit (Dirty Propane Converted Clean Burning Propane)
The following Propane Burner was designed for our customer Richard King of South Carolina. He was throwing a super bowl party in his gazebo and he wanted to convert his existing propane fire pit to one that could burn without sooting while still using propane.
Below is what was sent to us to convert. As you can see the flames were rather small and there was a lot of black smoke. The reason is once you start to turn up the fire, the soot starts to show. So often you will be told not to turn up the flames. Which makes us say - Whats the Point Than!
We calibrate the air mixer to the ring, and install the valve system, pilot light and thermocouple. And as you can see the flame goes from low, medium and to high without sooting! Allowing you to burn cleanly while using a propane gas.
And here is Richard's hand built gazebo, which turned out beautifully!
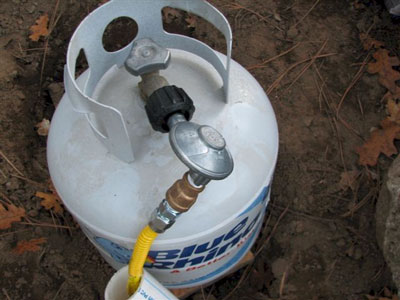
The FPPK (fire pit propane kit) is installed under the deck.
The controls were adapted to his old controls.
Thanks for the pictures Richard, looks like the Super Bowl Party was a big success!

The fire pit below was installed in Sydney, Australia by Ian Sutherland. He did a great job on his new patio and fire pit. We inspired him to build this really nice back yard project and we were glad to help. The glass that was used was Azurlite Base Glass and Starfire Base Glass.
 |
 |
 |
 |
 |
 |