"Click HERE for the DIY Network/ Yard Crashers Site!"
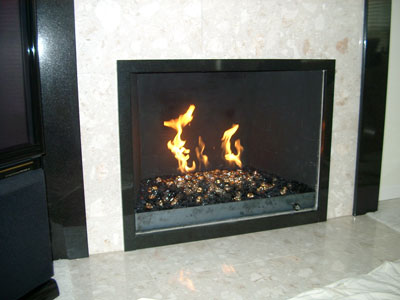
The fireplace below belongs to Todd. As you are going to see one great before and after transformation.
He used an 1/8" Clear Base Glass with Starfire Base Glass on top. Then he added Red R Topper, Black Luster Topper and a few Clear Diamonds.


Out with the old and in with the new!


We would of liked more pictures of it burning but Oh Well!

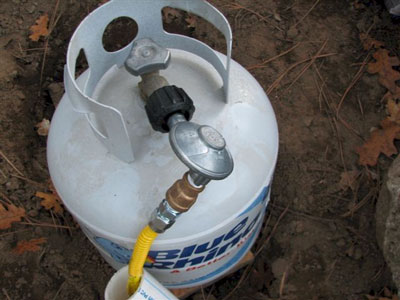
The burner below is one of our
FPPK's (fire pit propane kit). With this FPPK we set it up for
Black Magic! This was table tested for the pictures. Hopefully the customer will send us pictures after and during installation. We first sent these pictures for the customers approval. Here you go! The pan below belongs to Scott Spector and he finally installed the fire pit in his back yard, WOW, one really nice backyard!
This is one of our propane pan burner with slight modifications.
As you can see around the lower edges it was leaking and yes we did fix this.
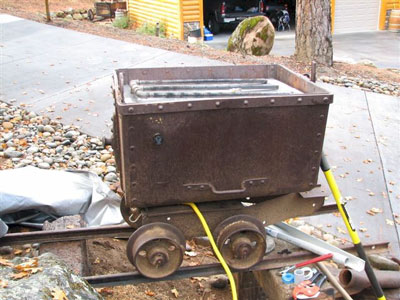
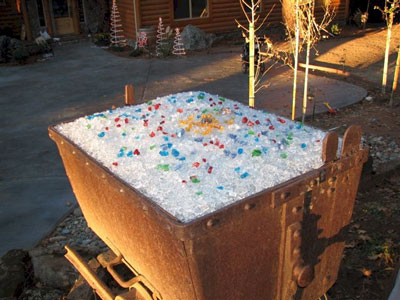
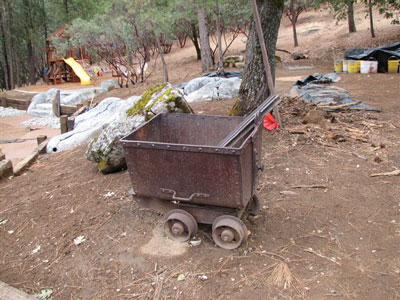
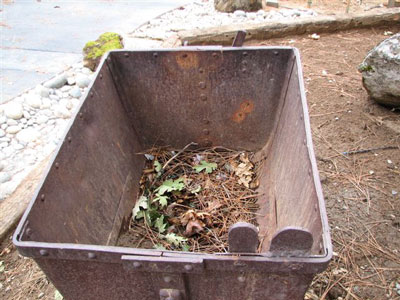
The fire pit below was built by Scott Spector in Florida. He started with an FPPK 30 which includes a 30" base plate and a double 24" stainless steel ring. Here we go from the beginning:

The propane line was run/ installed under the pavers.


The colors that were used are
1/2" Clear Base Glass,
Black Magic in the center,
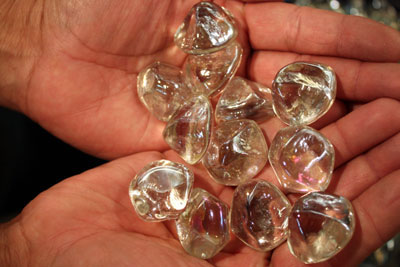
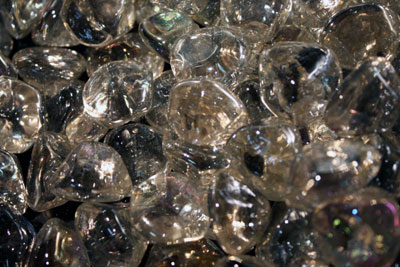
Clear Diamonds,
Cobalt Blue Topper,
Clear Topper,
Cobalt Blue Light Topper
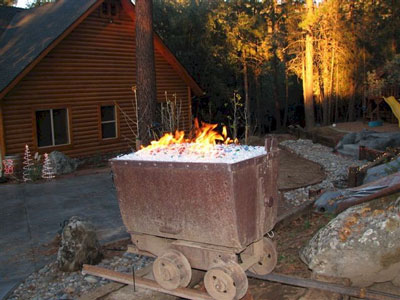
and our FPPK 30". That is our 30" propane burner. You can see the actual burner above burning before shipment and installation.

We don't have any pictures of the fire pit burning at Scott's but he did tel us that when he fired it up again he would try to send us a few pictures. Thanks Scott.

Do it yourself fireplace remodel made easy, or at least it seems that way.
First, the tile that was installed is not rated for fire. This tile would of popped off as soon as the fire was turned on. So do a little research before you begin. We can help in many ways, just call and ask.

It may have of seemed to be a good idea at the time, but it wasn't!

When redesigning a fireplace we suggest card board mache'. A card board mock up so you can see a basic preview of your project.


Below you can see the bottom, top and mantle in card board.


Now the rip and tear process begins!

Below we installed the extra electrical for the components and the TV. The components will be installed on the right side out of view with a black glass door. This will be installed later.

Below the framing begins.


Below we now added the Durock at the fireplace opening. This is key to the whole project. Math is very important when doing these layouts!


Below you can see the slate is being added.


Above and below the fireplace is 90% finished. The mantle needs to be installed and the door on the right to conceal the components needs to be installed as well. The inside of the fireplace will have 3 pieces of black galaxy granite installed. We will post these pictures of the fireplace when it is completely finished as well.

Now for the glass installation. We started with a satin black paint on the back walls, until we install the granite. Then we bulked up the base with 2" of white sand as this will save you a bunch of money! We used sand because we were pouring Starfire Base Glass in the fireplace. If we were to use a darker color of glass we would of used our crushed lava rock as a filler. When using sand, always make sure the burner is on top of the sand.

Test the burner/ location making sure the flames don't hit the walls.


Then pour the glass!


We added a few Pink Diamonds and then later added Ice Ice Ice Topper and Clear Diamonds. These products because of the way they are made appear to be melting on the inside.


The sealer that was used was a stone enhancer, not just a regular cheap sealer. When using rock you always want to see the beauty of the stone you are using.


As you can see the mantle is still missing. We have a few more details to still do and as soon as we have time to post the pictures, they will be here.
We encourage imagination to all of our customers and we support you and your projects. Regardless how simple or how creative. This is one of the elements that spawned our success and continues to do so.
The fireplace below is located in Beverly Hills California. We used a Gray Base Glass with about 6 lbs of Clear Diamonds.


The fireplace below is in Beverly Hills California. We used a Starfire Base Glass with Clear Diamonds and Black Luster Topper.


The fireplace below was installed by Scott Hansford of Palm Springs California.
We made an aluminum border to separate the glass from the outer stone layer. This helped in design and saved on glass as well. We will explain as we move on:
Do you see how high the gas connection is? We sent a 90 degree elbow to point the gas line down and then added enough filler to the bottom of the gas line to conceal it under the glass.
The metal border is installed holding the outer layer of rock in place.
They didn't like the post in the fireplace so we cut a mirror to preview if in fact they wanted it covered at all. If they would of wanted it covered we would of made piece of super 8 stainless steel (highly polished) to cover the post. The mirror was only a temporary visual. DON'T USE REGULAR GLASS NEAR ANY FIRE! So if you are not sure, preview it. The glass we used was a
Bronze Base Glass with
Gold Base Glass and
Clear Diamonds.
The stove below had a set of logs installed, yuk! We used the original burner and just raised the thermo coupler to the surface of the glass. The glass will get to about 700 to 750 degrees in about an hour burning at 80,000 btu's.


We used a Clear Base Glass, Lagoon Topper and a few Clear Diamonds and Pink Diamonds.

Much nicer than LOGS! No Really!

This next fireplace was done with lack of knowledge! First they installed a 18" single burner and some real interesting choices of glass. What they did do correct is have a 3" sand bed under their yuk glass. The first issue we repaired was the stub out on the left side of the fireplace floor. All we did was install a 90 degree elbow and connect a 1/2" flex line to the new double 24" burner. They had left the flex pointing in the air and then reduced it to a 3/8" line and to top that off added they very sad single 18" burner. We repainted their futile attempt (of painting) with Metallic Brown, added 10 lbs of sand and poured 75 lbs of Starfire Base Glass over the new burner and sand filler. We will explain as we move forward:


Below you can see the black marks under the paint.

Below you can see the flex line that was installed was left above the surface. Now if we tried that I think our customers would take us out and string us up, what do you think? To top it off this customer was an attorney! Completely happy with what we did.

Here is the new paint on the back walls.

Now we added the Starfire Base Glass. One thing we have been doing a little bit different is to bring the glass out from the front of the fireplace. We let the glass come out of the fireplace from 3 to 6 inches to make it look even more grand. What do you think?


Here is a the almost finished product of what we do! We left several colors with the customer to add. We will post pictures when they arrive.

Below are the finished pictures of what else was added:
Amber Base Glass,
Ice Ice Ice Topper,
Clear Diamonds,
Fuchsia Topper,
Purple Topper,
Red R Topper,
Roma Red Topper
I think it turned out very colorful! Check it out!


The fireplace pictures below is a before and after fireplace.
YUK?!

The glass that was installed is:
You be the judge, a very nice mix of colors. Many times better than the BEFORE!

The before and after pictures below are of a Starfire Base Glass and Clear Diamonds.


The fire place below is very unique because it is back lit Onyx. They used Clear Diamonds and Amber Diamonds for accents.


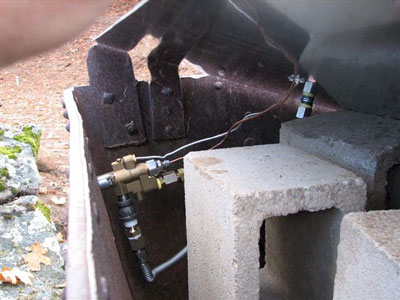
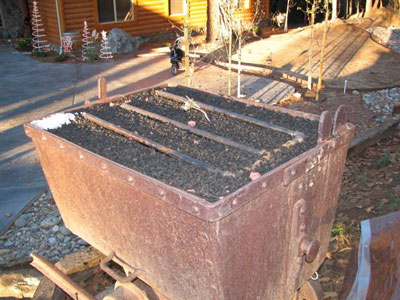
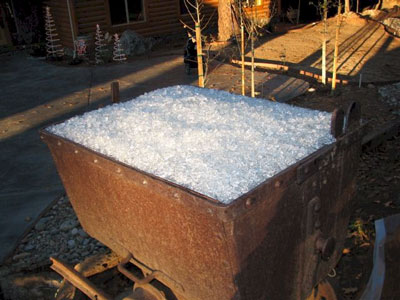
The next fire pit below has one of our FPPK's installed. We didn't supply the star burner bur we did get it to burn correctly with a Ford Blue Base Glass. Then it was Topped with Clear Diamonds and Blue Diamonds. We will explain as we move on.

Below you can see the gas shut off on the left and our FPPK box on the lower right.


Below you now have fire! It was a bit windy but you get the idea.

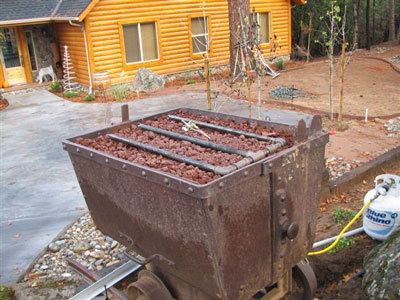
And of course how it looked when they started. YUK!
When burning, the Diamonds have a convex bottom which make it appear that it is melting on the inside.
Randy
Micek did a nice job on his Palm Desert home! He painted the interior with Ivory Fireplace Paint. The colors he installed are:
Now we have a splash of color!

The next set of fireplace pictures are from Jim Malless. We made a 4" tall pan and installed a battery operated remote control under the pan. The pan has a removable front face to conceal the components. The glass that he installed is:
Starfire Base Glass,
Clear Base Glass under the Starfire Base Glass, (more cost effective)
and a few Amber Diamonds!


These pans are built to fit each fireplace one at a time. Yours will be made just for you.


The next "B" vent or Direct Vent fireplace is from Mark Basillus, Showing how easy it actually is. Again for all of those "Dummies" out there that keep telling you that you can't do it. Also keep telling you "the sky is falling!" I had to say that!
Oh look! Nice logs! NOT!
Mark added 19 lbs of
Starfire Base Glass, 2 lbs of Clear Pyrite, and 1 lb of
Clear Diamonds. We did a few special effects as well. It cost Mark $313.40 plus shipping to convert his fireplace, complete! 11/30/2010. No Really!
Here is what Mark had to say:
Ed,
Wanted to share with you the photos of our finished conversion to fireglass.
We are really pleased that we decided to paint the inside of the fire box
red. That coupled with the glass had made the fireplace a focal point to
our living area!
Mark Basilius
The next fireplace belongs to Scott Dexter. He installed: